
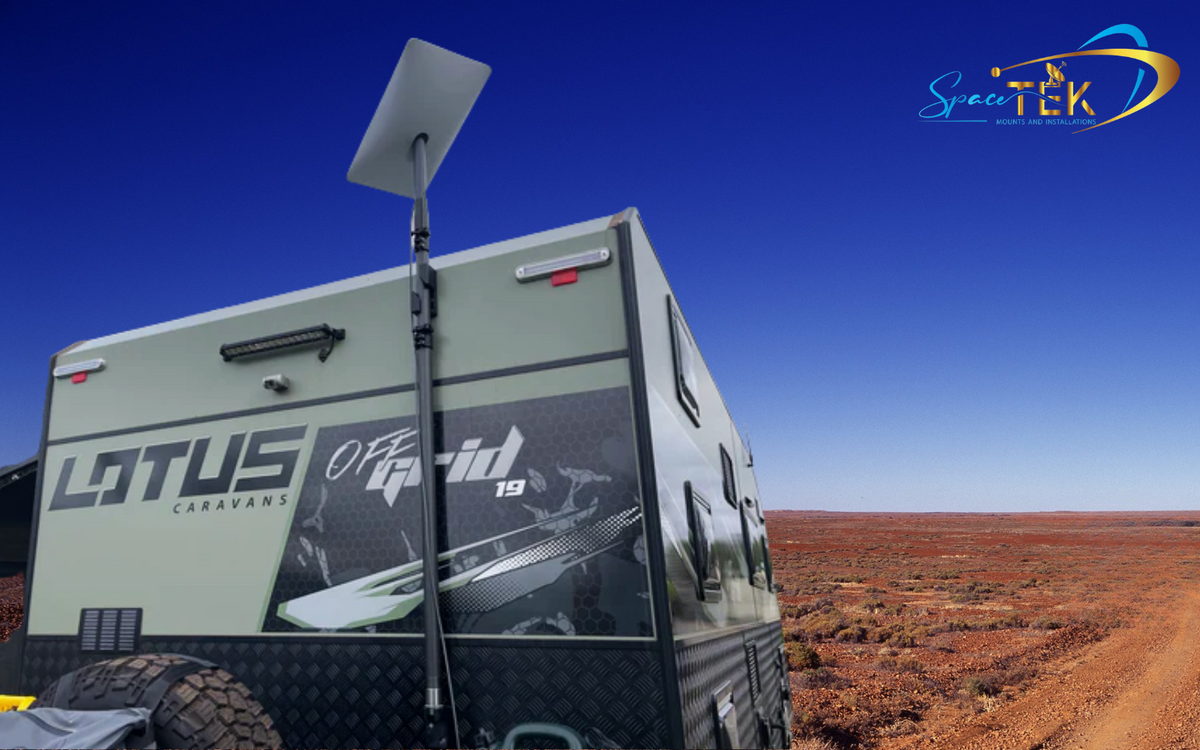
To find the right mount for Starlink RVs and caravans in Australia, match your travel style to either a telescopic carbon fibre pole mount for campsite flexibility, a magnetic mount for 4WD canopies, or a low-profile roof mount for instant setup. Selecting purpose-built hardware precision-machined from folded aluminium or reinforced composite ensures your dish remains secure against severe outback corrugations and highway wind loads.
Hi, I'm Andrew Ziogas, managing director at SpaceTek Australia. Over years of developing and testing rugged satellite hardware for remote Australian touring, I have helped thousands of caravanners and off-grid travellers achieve dependable high-speed connectivity across the continent.
Key Takeaways for Buying Starlink RV and Caravan Mounts in Australia
- Travel style, campsite selection, and parking habits determine whether a fixed roof mount, magnetic vehicle fixture, or telescopic pole setup will deliver the most reliable satellite connection.
- Starlink Mini and Standard Gen 3 / V4 terminals differ significantly in physical dimensions, field of view, and power requirements, making terminal-specific dish mount selection essential.
- Powering your hardware with dedicated StarPower V2 or StarPower V3 DC power supplies provides superior DC-to-DC efficiency over AC inverters and enables clean integration with custom network equipment.
- High-corrugation touring demands purpose-built dish mounts precision-machined from folded aluminium or reinforced composite, paired with weatherproof cable entry hardware.
Which Starlink Dish Mount Setup Best Suits Your Caravan Travel Style?
Choosing the right mounting hardware comes down to balancing campsite flexibility against setup speed. When travelling through regional and outback Australia, you will constantly navigate trade-offs between parking your van in shaded campsites and positioning your satellite dish with a completely clear line of sight to the southern sky.
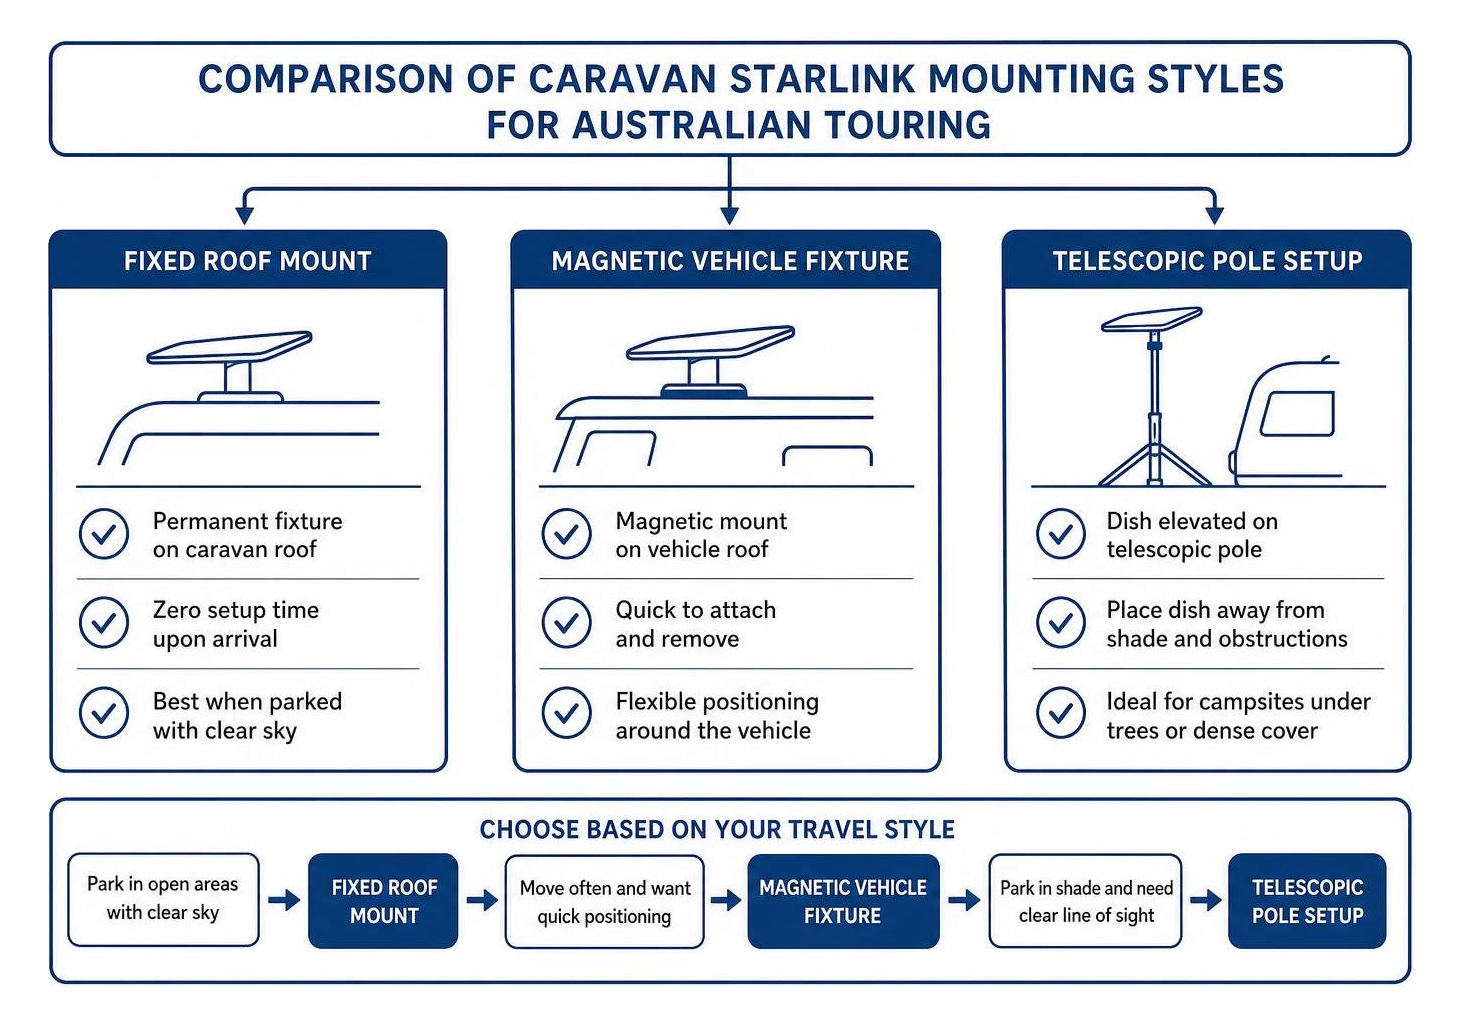
If you install a permanent fixture on your caravan roof, you gain the convenience of zero setup time upon arrival. However, if you pull into a campsite along the Murray River or through the Karri forests of Western Australia and park beneath dense tree cover, a fixed installation cannot receive a stable signal. Conversely, a portable or pole-mounted dish lets you leave your caravan safely shaded while elevating your terminal into clear sky.
Telescopic Carbon Fibre Pole Mounts
Telescopic pole systems represent one of the most practical and popular choices for Australian caravan and campervan setups. A lightweight carbon fibre telescopic RV mount extends smoothly to provide the elevation needed to clear surrounding vehicle clutter, awnings, and low-lying scrub.
A telescopic pole mount solves several distinct challenges on a touring rig:
- Preserves Roof Real Estate: Modern caravans carry extensive solar arrays, rooftop air conditioners, and vent hatches. A side-mounted or drawbar-mounted pole keeps the roof completely clear for energy generation.
- Elevates Cable Connections: By raising the terminal above the ground, your delicate data and power leads stay out of red dust, wet grass, and camp surface runoff.
- Packs Down for Transit: Weighing very little, the carbon fibre pole collapses down to a compact profile that stows easily in a tunnel boot or rear storage box.
For maximum structural rigidity on corrugated roads, the mounting fixtures are engineered with dual-point wall fixtures, maintaining generous spacing between the upper and lower attachment points on your caravan wall or rear bar.
In-Motion and Magnetic Vehicle Mounts
For 4WD canopies, service bodies, and metal roof setups, magnetic dish mounts offer rapid deployment and secure anchoring on compatible steel surfaces. Precision-machined with high-strength multi-magnet bases, these fixtures provide dependable holding power while allowing quick removal when transitioning between vehicles.
Before using Starlink in motion, always ensure:
- Your mounting hardware is specifically rated for highway wind loads and high-speed dynamic forces.
- The mounting base is anchored to a structurally sound flat surface.
- You are operating on an active Starlink service plan that permits mobility and in-motion use.
For an independent touring perspective on practical Starlink use, see this 12-month review of Starlink for travelling Australia.
- Your mounting hardware is specifically rated for highway wind loads and high-speed dynamic forces.
- The mounting base is anchored to a structurally sound flat surface.
- You are operating on an active Starlink service plan that permits mobility and in-motion use.
Permanent Flat and Roof Rail Mounts
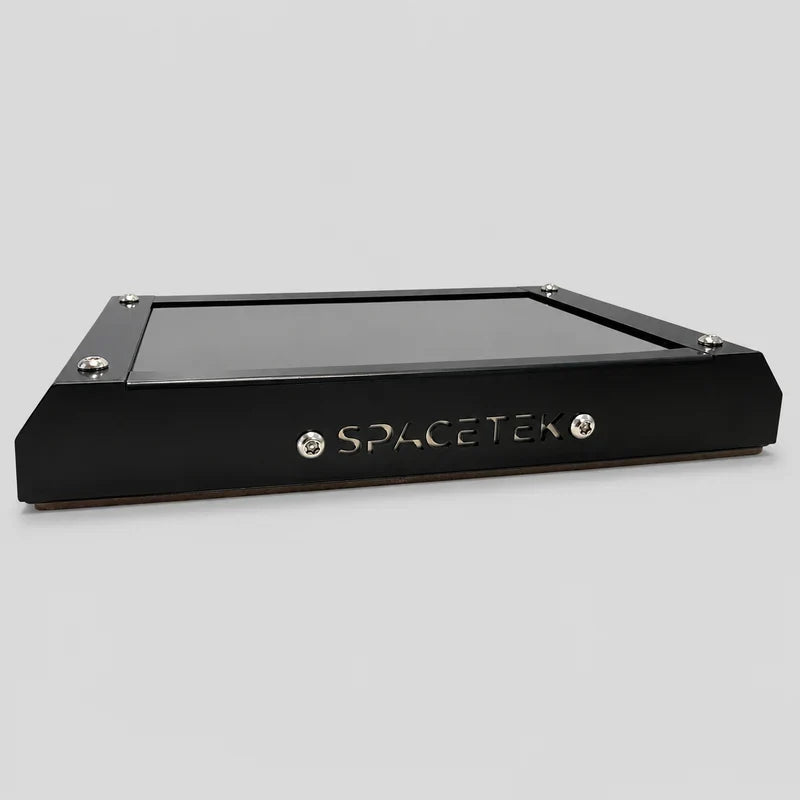
Permanent rooftop dish mounts provide an integrated, aerodynamic installation for travellers who prioritise immediate connectivity the second the handbrake is engaged. Constructed from folded aluminium and reinforced composite materials, these low-profile dish mounts sit securely on roof tracks, crossbars, or direct-bonded aluminium mounting plates.
The primary consideration with a permanent flat roof mount is campsite obstruction. If your roof is permanently fixed beneath canopy shade, your internet speeds will suffer frequent dropouts. Many long-term touring nomads resolve this by pairing a permanent roof fixture with a quick-release mechanism, allowing them to unclip the dish and mount it on an extension pole when camped in heavily timbered locations.
How Do You Mount and Power Starlink Mini vs Standard on an RV?
The physical and electrical differences between the portable Starlink Mini and the Standard Gen 3 / V4 terminal significantly influence your installation layout. Selecting the right hardware requires matching your dish mount directly to your terminal generation and designing an efficient off-grid power supply.
Power Management and Direct DC-to-DC Conversion
Running satellite internet from a 12V or 24V caravan house battery system through a standard 240V AC inverter introduces substantial inefficiency. Inverters continuously consume standby power simply idling, and converting DC battery power up to 240V AC only for the Starlink power supply to step it back down to DC creates unnecessary thermal waste and battery drain.
Utilising purpose-built StarPower V2 and StarPower V3 DC power supplies resolves this issue by providing:
- Higher Energy Efficiency: Direct DC-to-DC conversion delivers clean, regulated power straight from your auxiliary battery bank to the terminal without dual-stage conversion losses.
- Lower Baseline Draw: Bypassing an inverter keeps your daily off-grid battery consumption significantly lower, leaving more stored energy for refrigeration and lighting.
- Router Independence: Direct DC power supplies allow you to power the dish directly and bypass the standard router to integrate custom 12V travel routers or third-party access points into your caravan network.
To further optimise energy storage while touring, you can use the sleep schedule feature built into the Starlink application to automatically power down the terminal during overnight sleeping hours.
Hardware Footprint and Field of View Differences
Understanding how the Starlink Mini compares with the Standard Gen 3 / V4 hardware ensures you select compatible dish mounts and position your terminal effectively:
- Field of View: The Standard Gen 3 terminal features an expansive 140-degree field of view, allowing it to maintain reliable contact with passing satellites even past light foliage. The ultra-compact Starlink Mini operates with a narrower 110-degree field of view, making it more sensitive to surrounding tree canopy and overhead physical obstructions.
- Physical Weight and Size: The Starlink Mini is remarkably compact and lightweight, making it ideal for telescopic poles, magnetic roof plates, and slimline vehicle roof racks. The Standard Gen 3 is larger and heavier, requiring robust, folded-aluminium dish mounts engineered specifically to manage greater wind loading.
- Integrated Electronics: The Mini features an integrated Wi-Fi router directly within the weather-sealed dish casing, eliminating internal caravan router boxes. The Standard dish relies on a separate internal router, requiring you to route the supplied data lead through your caravan shell.
- Hardware Compatibility: Dish mounts are strictly non-interchangeable across generations. Always ensure your chosen Starlink mounts are precision-machined specifically for your exact terminal model.
What Installation and Cable Management Steps Ensure Off-Grid Durability?
Caravanning across regional Australia subjects your hardware to relentless vibrations, severe heat cycles, torrential rainfall, and rough corrugated tracks. A secure, clean physical installation is critical to protect both your caravan body and your satellite equipment.
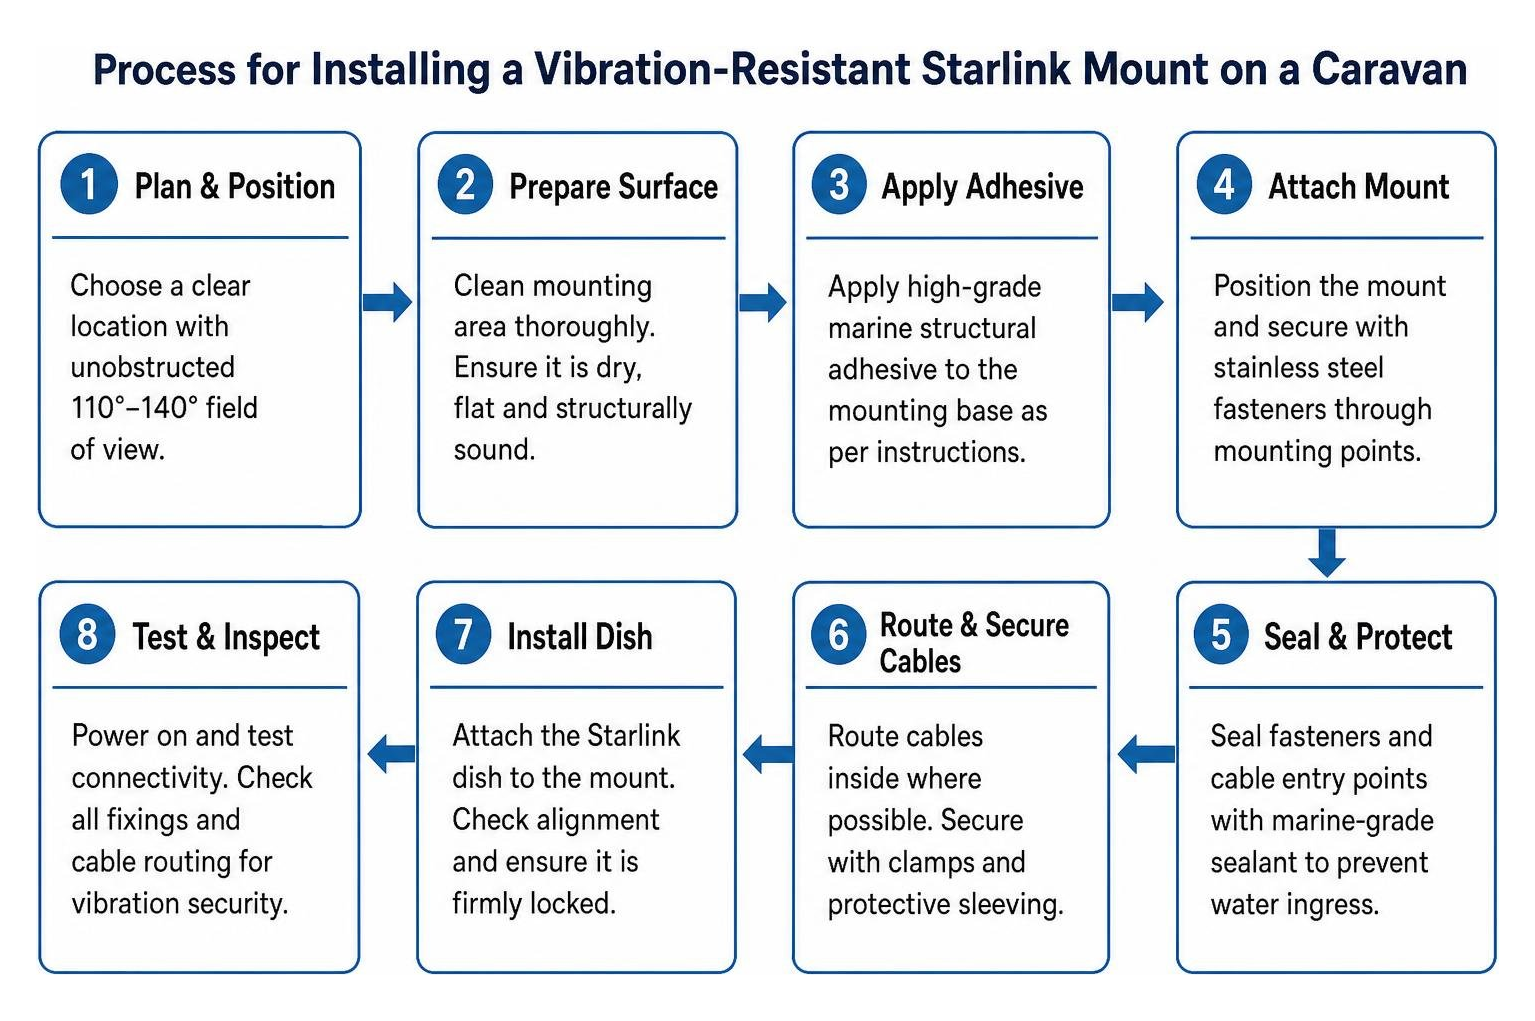
Secure Mechanical and Adhesive Mounting
Caravan external walls are constructed from diverse materials, including composite sandwich panels, aluminium cladding, and fibreglass laminates. Securing dish mounts requires a dual-retention approach that combines mechanical fasteners with high-grade marine structural adhesives.

When fitting exterior dish mounts to your van:
- Surface Preparation: Thoroughly clean and degrease the mounting area using isopropyl alcohol to ensure complete bonding of marine adhesives.
- Mechanical Fastening: Use corrosion-resistant stainless steel screws or aluminium rivet nuts to clamp the mounting plates firmly in place while the adhesive cures. Always verify wall thickness and internal framing locations before drilling.
- Vibration Damping: Precision-machined aluminium and reinforced composite dish mounts distribute mechanical stress evenly across the panel, preventing point-loading and stress cracking over corrugated outback tracks.
- Structural Verification: Check your caravan manufacturer's warranty terms and structural guidelines before making exterior penetrations or mounting heavy hardware to external panels.
Weatherproof Cable Routing and Storage
Never route Starlink cables through cracked windows, pop-top canvas zippers, or door seals. Pinching cables damages internal copper conductors and creates water ingress paths directly into your living space.
- Weatherproof Entry Sockets: Install an IP68-rated external cable entry housing or recessed waterproof data socket on your caravan wall. This allows you to plug your dish lead in externally while keeping the internal wiring completely sealed against dust and rain.
- Strain Relief: Secure your cable runs along the pole or vehicle body using UV-stabilised clips or hook-and-loop straps. Allow a gentle drip loop below the cable entry point so rainwater sheds away from the connector rather than running toward the seal.
- Bend Radii and Spooling: Starlink cables are high-bandwidth data leads that can fail if subjected to sharp kinks. When packing down camp, spool the cable smoothly in large loose coils rather than wrapping it tightly around your elbow, and protect the connector ends with dust caps during transit.
Frequently Asked Questions About Starlink RV and Caravan Mounts
Can I Use Starlink While Driving My Caravan or RV in Australia?
Using Starlink in motion requires three things: an eligible mobility service plan from Starlink, a terminal rated for in-motion operation, and an aerodynamic dish mount engineered to withstand highway wind speeds. Compact terminals like the Starlink Mini installed in low-profile, folded-aluminium in-motion dish mounts are popular for vehicle roofs and canopy racks. Always ensure all mechanical fasteners and locking pins are fully secured before setting off.
Should I Choose a Fixed Roof Mount or a Removable Mount for My Caravan?
If you prefer effortless setup and frequently camp in wide-open, unshaded outback plains, a fixed roof dish mount provides instant connectivity the moment you park. However, if you often choose shady campsites beneath trees, a removable telescopic pole mount is far more practical. It allows you to park your caravan in the shade while positioning your satellite dish up to several metres away in an open clearing with clear sky visibility.
What Should I Check Before Connecting Starlink to My Caravan Battery System?
Before hardwiring your satellite equipment into an auxiliary 12V or 24V battery bank, verify the exact power input specifications of your terminal generation. Always install a compatible, regulated DC-to-DC power supply rather than connecting raw battery voltage directly to the dish, as vehicle battery voltages fluctuate during solar charging and alternator cycles. Ensure your power supply features built-in over-voltage and short-circuit protection.
How Do You Choose Your Ideal Caravan Starlink Mounting Solution?
Selecting the best Starlink dish mount for your caravan involves balancing your preferred camping style, roof real estate, power management setup, and terminal model. Whether you opt for the rapid elevation of a carbon fibre telescopic pole, the convenience of a low-profile rooftop dish mount, or the modular flexibility of a magnetic vehicle fixture, investing in purpose-built, Australian-designed hardware guarantees reliable connectivity wherever your travels take you.
Explore our Australian-designed mounting hardware and power accessories for your rig:

Leave a comment
This site is protected by hCaptcha and the hCaptcha Privacy Policy and Terms of Service apply.