
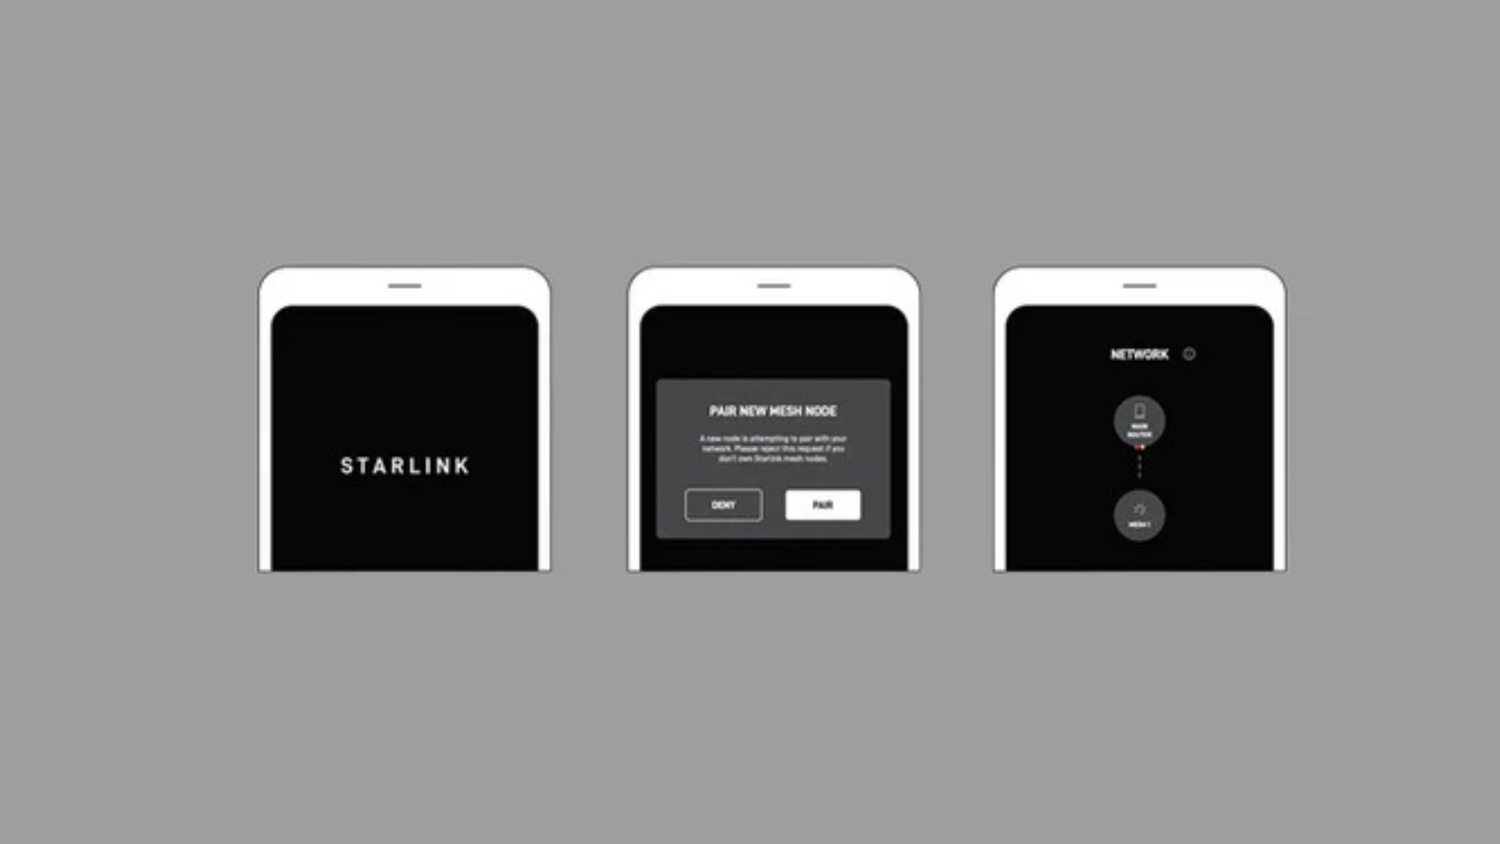
Why You Need to Connect Mesh to Starlink
Connecting a mesh WiFi system to Starlink can extend wireless coverage throughout your home. Here is the quick overview:
For Compatible Official Starlink Mesh Nodes:
- Make sure your Starlink Kit is online.
- Place the first compatible mesh node where it can still receive a strong signal from the main router.
- Plug the node into power and open the Starlink app.
- Follow the pairing notification or mesh setup option shown in the app.
- Repeat for additional compatible nodes, checking connection quality after each one.
For Third-Party Mesh Systems:
- Confirm which Ethernet connection your Starlink router supports. A Gen 2 router generally requires the Starlink Ethernet Adapter.
- Connect the primary third-party mesh router to the Starlink router or adapter.
- Choose either Bypass Mode on the Starlink router or access-point mode on the third-party system, as supported by your equipment.
- Complete setup using the mesh manufacturer’s app or instructions.
Important Considerations:
- Node spacing depends on your floor plan, wall materials, interference, and the mesh system you use.
- Add only as many nodes as needed for useful coverage; unnecessary nodes can complicate placement and channel use.
- Use wired backhaul where your hardware supports it, or place wireless nodes where they maintain a strong link to the rest of the mesh.
Weak WiFi can be frustrating in rural homes, large houses, workshops, and other properties where one router cannot cover every room. Your Starlink connection may be working correctly at the router while bedrooms, a home office, or an outbuilding still experiences weak or inconsistent WiFi.
A mesh network can address this local WiFi problem by using multiple coordinated access points. Rather than relying on one router to reach the entire property, the nodes work together to provide coverage across more of the building.
I’m Aaron Wroblewski. Over more than 25 years working with remote communications and satellite systems in Australia, I’ve helped customers improve connectivity in challenging environments. At SpaceTek, that experience informs the practical setup guidance and Starlink-compatible mounting products we offer to customers in multiple markets.
Getting Started: Prepping for a Seamless Mesh Network
Before you connect mesh to Starlink, identify your router, available ports, and mesh-node model. Starlink has supplied several hardware combinations, and the correct connection method depends on the equipment you actually have.
Understanding Your Starlink Hardware
Check the label, Starlink app, and current documentation for your router and mesh nodes before purchasing an adapter or cable. Common configurations include:
- Gen 1 Router with Circular Dish: This router includes an Ethernet connection for a third-party system. Do not assume newer official Starlink mesh nodes will pair with it; verify compatibility for the exact node model.
- Gen 2 Router with Rectangular Dish: The router does not have a standard Ethernet jack. A wired connection to a third-party mesh router generally requires the Starlink Ethernet Adapter. Compatible official Starlink mesh nodes can connect wirelessly without that adapter.
- Gen 3 Router: This router includes Ethernet ports, making a wired connection to many third-party routers or compatible mesh equipment more straightforward.
- Starlink Mini: Mini hardware and available networking features differ from the residential router kits. Confirm its current Ethernet and third-party-router instructions before choosing your topology.
SpaceTek offers hardware-specific product categories, including Starlink Mini accessories, Gen 2 accessories, and Gen 3 mounts and accessories. Match any mount or accessory to your exact Starlink model before ordering.
Prerequisites Checklist
Before you begin, make sure you have the following:
- A working Starlink Kit with internet access.
- The current version of the Starlink app installed on your mobile device.
- Your main Starlink router powered on and broadcasting WiFi, unless your planned setup requires a different initial state.
- Compatible mesh nodes and accessible power outlets near their proposed locations.
- For a Gen 2 router with a wired third-party system: A compatible Starlink Ethernet Adapter.
- For wired connections: Suitable Ethernet cables and any adapters required by the equipment manufacturers.
- The current setup instructions for both your Starlink router and your mesh system.
How to Connect Mesh to Starlink: Your Step-by-Step Guide
With your hardware identified, choose the instructions for compatible official Starlink nodes or a third-party mesh system.
How to Connect Mesh to Starlink Using Official Nodes
Compatible official Starlink mesh nodes are designed to be configured through the Starlink app.
Wireless Setup
- Confirm that your main Starlink router is online and working.
- Plug the first compatible Starlink mesh node into an outlet in a location that still receives a good signal from the main router.
- Open the Starlink app while your phone is connected to the Starlink WiFi network.
- Follow the pairing notification or mesh setup option displayed in the app. The exact wording and timing can vary by app and firmware version.
- Allow the node to finish configuring, then check its reported connection quality before adding another node.
For the documented pairing sequence, see Starlink’s official Mesh Set Up Guide (PDF). Because Starlink offers multiple router and node models, also check the instructions supplied with your hardware.
Wired Setup Where Supported
Ethernet backhaul can reduce the amount of traffic carried over the wireless link between nodes. If your Starlink router and compatible mesh equipment support this configuration, connect them using the ports and cable arrangement specified by Starlink. Do not assume that every official Starlink node, router generation, or firmware version supports the same wired-mesh behavior.
How to Connect Mesh to Starlink with a Third-Party System
A third-party mesh system normally needs a wired connection from Starlink to its primary router or gateway.
-
Connect the Hardware:
- Gen 2 Router Users: Connect the Starlink Ethernet Adapter according to Starlink’s instructions, then run an Ethernet cable from the adapter to the WAN or Internet port on the primary third-party mesh router.
- Routers with Built-In Ethernet: If your Starlink router has a compatible Ethernet port, connect it to the WAN or Internet port on the primary mesh router. Confirm the port functions in the documentation for your exact router.
- Starlink Mini Users: Follow the current Mini networking instructions because its connection and bypass options may differ from those of the residential routers.
Choose How Routing Will Be Managed: One option is to enable Bypass Mode in the Starlink app so the third-party mesh system handles WiFi and routing. The app menu location can vary by version. Another option, when supported, is to leave the Starlink router active and configure the third-party mesh system in Access Point or Bridge Mode. Avoid running two independent routing layers unless you understand and accept the resulting double-NAT configuration.
Set Up Your Mesh: Follow the manufacturer’s instructions for internet detection, WiFi naming, node addition, updates, and placement. Test the network before making permanent cable or node installations.
Before enabling Bypass Mode, review the current instructions on Starlink Support, including how to reverse the setting for your router. Reset procedures vary by hardware, so use the documented method for your exact model rather than a generic power-cycle sequence.
For system-selection considerations, see our guide to mesh systems for Starlink users.
Best Practices for Node Placement and Performance
Mesh performance depends on both client coverage and the quality of the connection between nodes. A node placed inside an existing dead zone may have too little signal to relay data effectively.
- Start Within Strong Coverage: Begin with the node relatively close to the main router, then move it toward the area needing coverage while monitoring link quality. One or two rooms may be a useful starting point, but it is not a universal distance rule.
- Centralize the Main Router: If cable routing and your installation allow it, place the primary router away from an outside corner, enclosed cabinet, or floor-level obstruction.
- Use the Topology Your System Supports: Some mesh systems can route through another node, while others perform best with direct or wired links. Follow the manufacturer’s topology and placement recommendations rather than imposing one rule on every system.
- Add Nodes Deliberately: Add one node at a time and test coverage. More nodes do not automatically produce better speeds, especially when nodes are crowded together or have weak backhaul connections.
- Minimize Obstructions and Interference: Keep nodes in open areas when possible. Brick, concrete, metal, appliances, and neighboring WiFi networks can reduce performance. An elevated shelf is usually preferable to a floor or enclosed cabinet.
- Consider Wired Backhaul: Ethernet between compatible nodes can be valuable for large homes, dense construction, or detached spaces where a wireless backhaul is unreliable.
For additional guidance, read Starlink’s article on improving WiFi connectivity or our guide to extending your Starlink range.
Troubleshooting and Final Touches
If the mesh does not work as expected, separate a Starlink service problem from a local WiFi or mesh problem before changing settings.
Solving Common Mesh Connection Problems
- Official Node Will Not Pair: Confirm that the node is compatible with your router, move it closer to the primary router, and make sure your phone is connected to the intended Starlink WiFi network. Restart the app and follow the current pairing instructions for the node model.
- Third-Party Router Has No Internet: Check the Ethernet cable, adapter, WAN-port selection, and status lights. Confirm that the Starlink connection works before the third-party router is added, then review the mesh manufacturer’s internet-detection and addressing instructions.
- Weak Connection or Slow Speeds: Test near the primary router first. Then check node placement, backhaul quality, wall materials, interference, device capabilities, and whether Starlink itself is reporting an obstruction or service issue.
- Some Apps or Services Do Not Work: A double-NAT arrangement can affect some inbound connections, games, VPNs, or device-discovery features. Use either Starlink Bypass Mode or access-point mode on the third-party mesh where appropriate for your equipment.
- The App Does Not Show the Expected Option: Confirm that the app and router firmware are current, that you are signed into the correct Starlink account, and that your phone is connected to the correct network. Menu names and available controls can vary by hardware.
- A Reset May Be Required: Use the official reset procedure for the exact router or node model. A factory reset removes configuration, so record important network settings and review the manufacturer’s instructions before proceeding.
For more practical checks, see our guide to boosting Starlink WiFi.
Conclusion: Achieving Whole-Home Coverage
Learning how to connect mesh WiFi to Starlink can help extend coverage beyond the area served by one router. The best setup depends on your Starlink router, compatible mesh equipment, building layout, and whether you can use wired backhaul.
Remember that a mesh network improves the local network inside and around your home; it cannot correct an obstructed dish, damaged cable, power problem, or upstream Starlink service issue. Check the Starlink app for dish and service status when troubleshooting performance.
SpaceTek Australia is an Australian company with experience in satellite communications and a range of Starlink-compatible mounting products and accessories. A secure, correctly positioned dish mount can support a sound installation, but buyers should select products by their exact Starlink model and installation requirements.
Ready to optimize your Starlink installation? Browse the relevant model-specific collections above or contact SpaceTek with details of your hardware and intended mounting location.



Leave a comment
This site is protected by hCaptcha and the hCaptcha Privacy Policy and Terms of Service apply.