
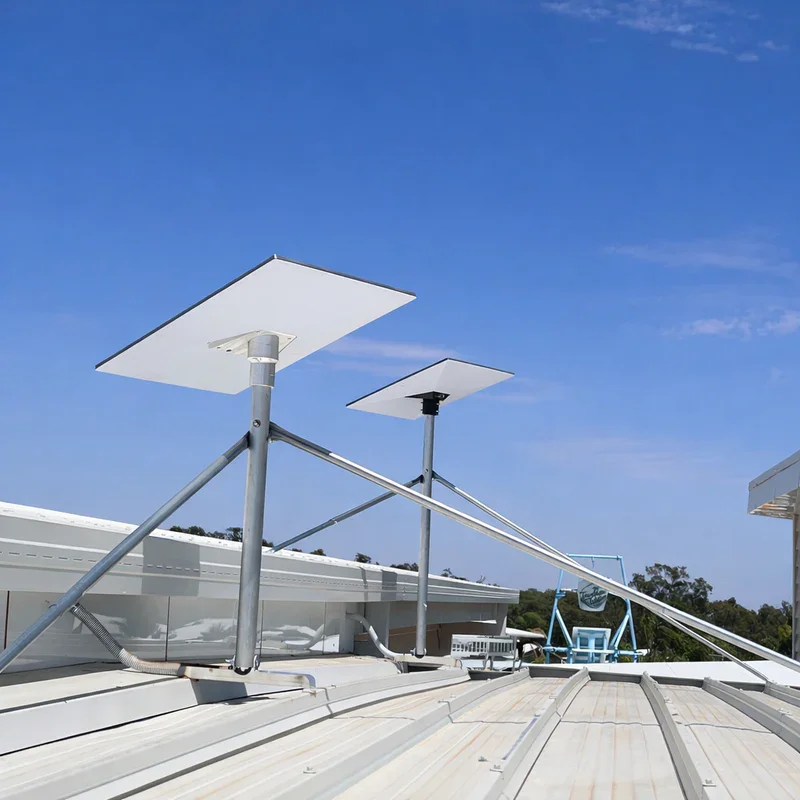
How do you check satellite dish alignment?
To check Starlink dish alignment, start with a mounting location that has a clear view of the sky. Use the Starlink app’s obstruction tool to identify potential blockages, then follow the positioning guidance for your specific dish model. Unlike a traditional satellite dish, Starlink connects to a moving constellation of low-Earth-orbit satellites, so it does not rely on fixed manual pointing settings.
A stable mounting position matters just as much as a clear view of the sky. Check that the dish is securely attached, installed in the orientation specified for its model and free from nearby obstructions that could interrupt its connection.
I’m Andrew Ziogas, Managing Director of SpaceTek Australia. One thing I’ve come to appreciate about satellite installations is that getting the right equipment in place is only part of the job. The way a dish is mounted, its view of the sky and the small adjustments made during setup can all affect how well it performs. It’s something we pay close attention to at SpaceTek, particularly when helping customers find the right mounting solution for their Starlink setup.
In this guide, I’ll walk you through some of the things worth checking when aligning a satellite dish and getting the most reliable connection possible.
Key takeaways for checking Starlink dish alignment
- Choose a mounting location with a clear view of the sky and use the Starlink app to check for obstructions.
- Follow the installation and alignment requirements for your specific Starlink model.
- Use the Starlink app’s Alignment tool if your hardware supports it.
- Check the dish, mounting hardware and cables after strong winds or physical movement.
- Avoid traditional satellite dish pointing methods involving LNB skew, compass bearings and dedicated satellite meters.
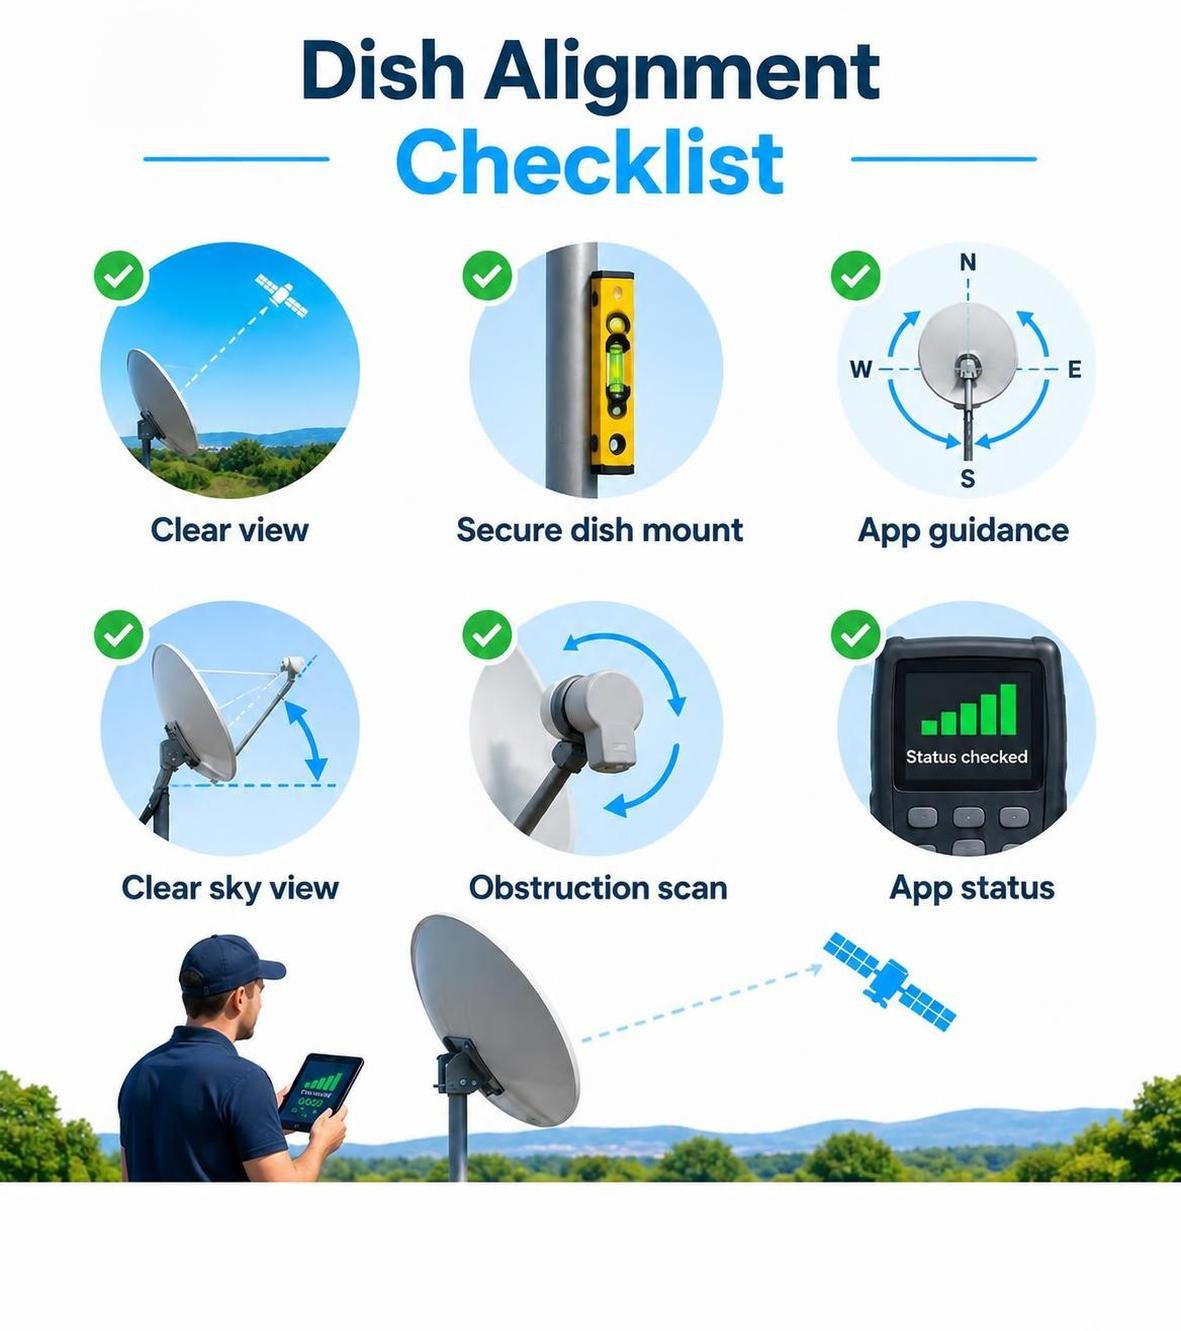
How do you prepare a Starlink dish before installation?
Before permanently mounting a Starlink dish, choose the clearest practical view of the sky and use the app’s obstruction check at the planned location. Starlink recommends assessing the installation location before fixing the hardware in place, because nearby trees, rooflines and buildings can interrupt service as satellites pass overhead.
Does Starlink need to be manually pointed towards a satellite?
No fixed compass bearing is used. Starlink communicates with satellites moving overhead, rather than one stationary satellite in a set position. The setup process depends on the hardware: some dishes position themselves automatically, while others use app-based alignment guidance. Check the instructions shown for your exact kit rather than applying a one-size-fits-all pointing method.
How do you check for obstructions before mounting?
Open the Starlink app and run its obstruction check from the intended mounting position. Move the phone around the proposed location as directed so the app can assess the part of the sky the dish needs. If the app identifies likely blockages, consider a higher or clearer mounting position before drilling or securing the dish mount.
For a practical overview of choosing and securing a suitable position, see SpaceTek’s Starlink dish installation and alignment guide.
How do you check that the dish mount is secure?
Use a mounting surface and hardware that suit the dish model and installation location. Follow the mounting orientation, tilt and clearance requirements supplied for that model, as these can differ between Starlink hardware generations. Once installed, confirm that the dish mount is firmly fixed, the dish cannot flex or shift, and the cable has a protected route without sharp bends or strain.
How do you check Starlink alignment in the app?
Starlink alignment is not a manual signal-meter exercise. After mounting the dish, use the app to confirm that the installation location and dish position meet the guidance for your specific hardware. The app features available can vary by model, so follow the prompts shown for your kit.
How do you check for obstructions using the Starlink app?
Use the app’s obstruction check before mounting, then review the obstruction map after the dish has been operating. It can take up to 12 hours for that map to build a more complete picture of interruptions caused by trees, rooflines or other objects. If interruptions appear, improve the dish’s view of the sky rather than trying to aim it at a fixed point.
SpaceTek’s guide to navigating Starlink dish obstructions explains the common site issues to rule out before moving the installation.
How do you use the Starlink alignment tool?
If your kit supports the Alignment tool, open it in the Starlink app and follow the on-screen positioning instructions. Alignment support is model-dependent: some current kits use app-based guidance, while older actuated hardware can position itself automatically. Do not force the dish into a direction that conflicts with the guidance for its model.
How do you confirm that your Starlink dish is correctly positioned?
Confirm that the app shows no positioning concern for your model, the dish mount remains stable and the dish has the sky clearance identified during the obstruction check. Then monitor the connection in normal use. A well-positioned dish should remain secure and maintain the clear view required by the app.
What should you check if the app reports that Starlink is misaligned?
First, read the alert in the app and confirm that your hardware supports an alignment check. Inspect the dish mount for movement, check that the dish is installed in the required orientation and look for newly developed obstructions. If the alert remains after correcting those issues, use the model-specific instructions in the Starlink app or Help Centre before changing the installation further.
How do you troubleshoot Starlink connection issues after installation?
For Starlink, start troubleshooting in the app rather than relying on traditional satellite signal readings. Check for obstruction alerts, connection-status messages and any service interruption notice, then inspect the installation for physical issues that could affect the dish or cable.
What should you check in the Starlink app?
- Review obstruction alerts and the obstruction map for repeated interruptions.
- Check whether your supported hardware shows a misalignment or positioning alert.
- Confirm the connection status and read any troubleshooting guidance shown in the app.
- Check for a service interruption notice before changing the installation.
What should you check after severe weather?
High winds, hail and debris can affect the mounting hardware, cable route and view of the sky. Check the app first, then inspect the installation before making any physical changes:
- Check the base, fixings and dish mount for movement or damage.
- Inspect the dish and its components for bends, debris or water build-up.
- Check the cable for damage, loose connections or strain.
- Clear new branches or fallen objects from the sightline where it is safe to do so.
- Re-run the app’s obstruction check if vegetation or the mounting position has changed.
How does Starlink alignment differ from a fixed satellite dish?
A traditional satellite dish is manually aimed at one geostationary satellite using fixed pointing settings. Starlink works with satellites moving overhead, so installation focuses on the required sky view, stable mounting and the guidance supplied for the exact hardware. The process is not identical across every Starlink generation: some dishes position themselves automatically, while supported newer models may use app-based positioning guidance. Treat the instructions for your dish model as the source of truth.
Starlink dish alignment questions, answered
How accurately does a Starlink dish need to be aligned?
Starlink does not require the fixed, manual pointing precision used for a traditional satellite dish. The important part is following the positioning guidance for the specific dish model, keeping the dish securely mounted and giving it the clear sky view identified in the Starlink app. Some kits position themselves automatically, while supported models provide app-based alignment guidance.
Can you align Starlink without a satellite meter?
Yes. A traditional satellite meter is not the normal tool for Starlink setup because the dish communicates with satellites moving overhead rather than one fixed satellite. Use the Starlink app’s obstruction check and any model-specific alignment prompts instead. Once the dish is installed, review the app for obstruction, positioning or connection alerts.
Why does my Starlink connection keep dropping?
Repeated dropouts are often linked to obstructions such as trees, rooflines or new vegetation entering the dish’s required sky view. Check the obstruction map after the system has been operating, then review the app for connection-status messages or service interruption notices. Also inspect the dish mount, cable route and connections for movement, damage or strain.
Do trees affect Starlink dish alignment?
Yes. Trees do not change a fixed pointing angle, but branches and leaves can block the moving satellites Starlink needs to see. Run the app’s obstruction check before mounting and review the obstruction map after installation. If trees cause interruptions, a clearer or higher mounting position may be needed.
Should you realign a Starlink dish after strong winds?
Start by checking the Starlink app for obstruction, connection or positioning alerts rather than manually changing the dish direction. Then inspect the dish mount, fixings, dish components and cable route for movement or damage. If the mount has shifted or the app identifies a model-specific positioning issue, correct the installation in line with the guidance for that hardware.
What is the best way to keep a satellite dish aligned?
The reliable approach is simple: choose a clear sky view, follow the Starlink app’s model-specific guidance and secure the dish mount to a suitable surface. Recheck the app, mounting hardware and surrounding vegetation after weather events or any work that could have affected the installation.
If you are choosing hardware for a more secure, stable setup, these SpaceTek options can help you match the mounting approach to your installation:
- Browse SpaceTek’s current Starlink dish mounts and accessories for residential and general installations.
- Shop Starlink Gen 2 mounts and accessories if you have a compatible Gen 2 dish.
- Explore 4WD Starlink mounts and accessories for vehicle-based or mobile setups.

Leave a comment
This site is protected by hCaptcha and the hCaptcha Privacy Policy and Terms of Service apply.