
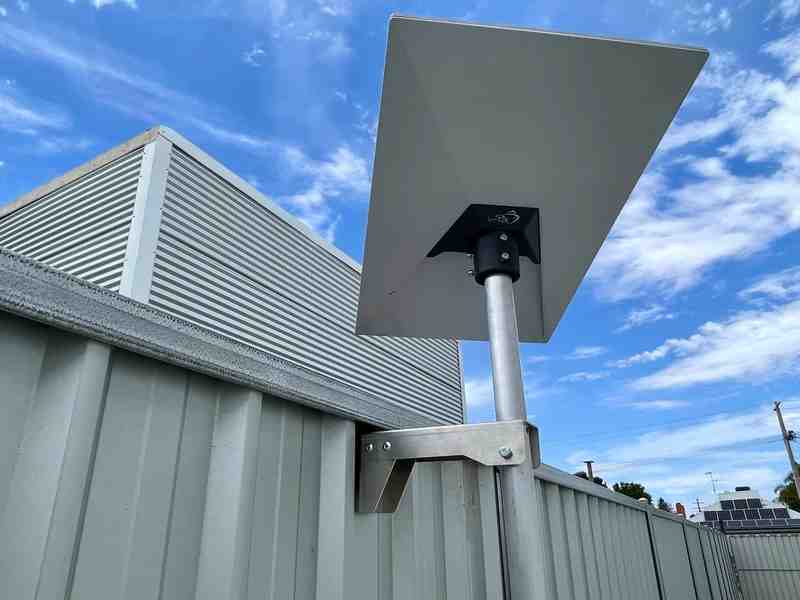
A rustproof Starlink wall mount gives your dish a secure, weather-ready fixing point on the side of your home, shed, site hut, or coastal property. The right setup comes down to corrosion-resistant materials, proper sealing, and a tidy install that keeps water away from your wall cavity.
Key Takeaways
- Choose a corrosion-resistant Starlink mount made from folded aluminium, precision-machined aluminium, or reinforced composite materials suited to Australian sun, salt, rain, and wind.
- Use neutral-cure exterior silicone around every pilot hole and fastener head so moisture cannot track into cladding, framing timbers, or screw threads.
- Keep the dish close to solid building structure where possible, as a wall mount can be easier to service and less exposed than a fully freestanding pole setup.
- Inspect the mount seasonally, especially in coastal areas, and rinse away salt build-up with fresh water before it has a chance to sit on the surface.
- Avoid mixing unprotected metals, untreated mild steel, or bargain hardware that may stain cladding, seize up, or weaken in harsh weather.
What Makes a Rustproof Starlink Wall Mount Last?
A good Starlink mount is not just about holding the dish up. It needs to stay firm through wind, heat, rain, and salt air without creating rust stains or letting water into the building. That is why material choice matters as much as the installation itself.
Premium dish mounts are typically made from precision-machined or folded aluminium, with protective coatings that help shield the surface from weather exposure. Aluminium naturally develops a thin oxide layer that helps slow corrosion. In plain English, that means the surface forms its own protective skin, which is handy when the mount is sitting outside all year.
For long-term durability, look for:
- Protective surface finishes: Powder coating adds a tough barrier against UV exposure, airborne salt, and moisture.
- Galvanic isolation: When stainless fasteners meet aluminium, moisture can trigger corrosion between the metals. Nylon washers, suitable coatings, or isolation barriers help prevent that reaction.
- Reinforced composite parts: Quality composite components can handle moisture and UV exposure without adding unnecessary weight to the wall.
How Do Wall Mounts Compare With Eave and Pole Mounts?
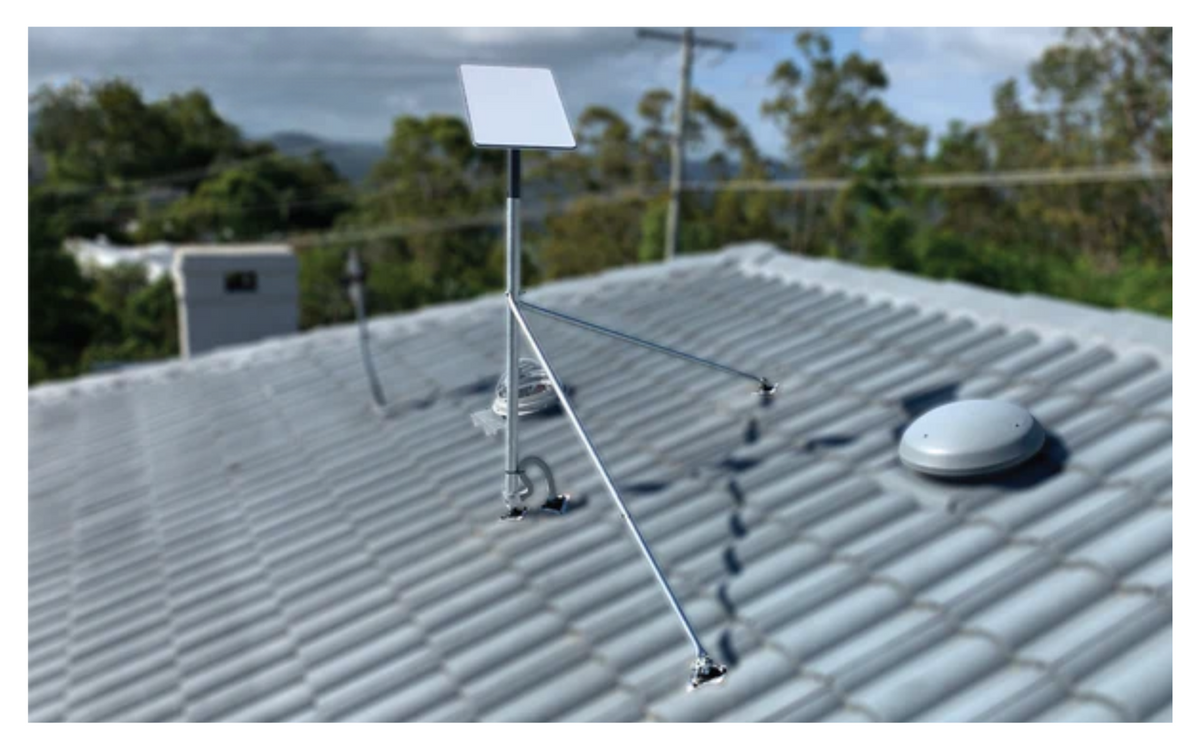
Each Starlink mounting position has its place. A wall mount keeps the dish close to the building, which can give it a more sheltered fixing point while still leaving it accessible for servicing. Eave mounts can be useful when the fascia or rafter tail provides a suitable fixing point, while pole mounts are handy when you need to lift the dish away from rooflines, trees, or other obstructions.
For most homes, sheds, and small site buildings, the best choice is the one that gives the dish a clear view of the sky without forcing you into an awkward cable run or a weak fixing point. If the wall has solid framing behind it and the obstruction check looks good, a rustproof wall mount is often a neat, low-fuss option.
How Do You Install a Starlink Wall Mount Without Creating Corrosion Problems?
A rustproof hardware kit still needs careful installation. Once you drill into an exterior wall, you create a possible path for rain, condensation, insects, and dust. The aim is simple: fix the mount into solid structure, seal every penetration, and route the cable so water runs away from the entry point.
What Should You Check Before Drilling?
Before picking up the drill, use the Starlink app to run an obstruction check from the planned wall position. Look for roof overhangs, gutters, trees, neighbouring buildings, or shed roofs that might block the dish’s view of the sky.
Next, confirm what is behind the cladding. A Starlink wall mount should be fixed into studs, beams, or another suitable structural member, not just thin cladding or hollow weatherboards. If the fixing point feels uncertain, it is worth getting a qualified installer to assess it rather than risking movement later.
Step-by-Step Installation for a Rustproof Starlink Wall Mount
Proper alignment and sealing help the dish stay secure in rough weather while keeping the wall structure dry. You can also compare the process with the official Performance Wall Mount Installation Guide when working with Starlink hardware.
- Run the obstruction check: Use the Starlink app at the planned wall location and make sure the dish has a clear sky view.
- Find solid structure: Locate the stud, beam, or framing member that will carry the load. Do not rely on cladding alone.
- Drill pilot holes: Drill clean pilot holes into the centre of the structural member so the fasteners bite properly and the timber is less likely to split.
- Seal the holes: Inject exterior-grade neutral-cure silicone into each pilot hole and add a bead around the outside edge.
- Fit the mount: Hold the mount square, align it with the pilot holes, and drive the supplied or suitable fasteners into place.
- Tighten carefully: Tighten the fasteners firmly without crushing cladding, stripping timber, or warping the mounting plate.
- Route the cable neatly: Feed the Starlink cable through the mast path without pinching it or forcing sharp bends into the connector end.
- Seat the dish: Slide the dish mast fully into the receiver and check that the locking mechanism is engaged.
Which Sealing Details Matter Most?
Small details make a big difference outside. Neutral-cure silicone is the safer choice around metal hardware because acidic-cure products can encourage oxidation as they cure. A drip loop in the cable also helps, because water running along the cable will fall away before it reaches the wall penetration.
Once the mount is tightened, smooth a thin bead of silicone over exposed fastener heads and around the edge where water might sit. You do not need to overdo it. The goal is a clean weather seal that can be inspected later, not a messy lump of sealant that hides problems.
How Do You Maintain and Inspect Outdoor Starlink Mounts?
Outdoor Starlink mounts do not need constant attention, but a quick seasonal check can save you from loose hardware, damaged sealant, or avoidable rust marks. This is especially true around the coast, where salt can settle on metal surfaces and hold moisture in place.
Use this simple maintenance checklist:
- Check fasteners twice a year: Wind, heat, and cooling cycles can slowly loosen hardware. Make sure the base plate still feels firm and has not shifted.
- Rinse coastal installs: If the mount is exposed to salt air, rinse the mast and mounting surface gently with fresh water every few months.
- Inspect the sealant: Look around screw holes and wall penetrations during gutter cleans. If the silicone is cracked, chalky, or peeling, remove the loose material and reseal it.
- Look over the cable: Make sure the cable jacket is not pinched, rubbed, brittle, or hanging where wind can make it flap against the wall.
- Watch for staining: Brown streaks, white powdery marks, or seized fasteners can be early signs that the hardware or coating needs attention.
Can Rustproof Wall Mounts Be Used on Mobile Rigs or Boats?
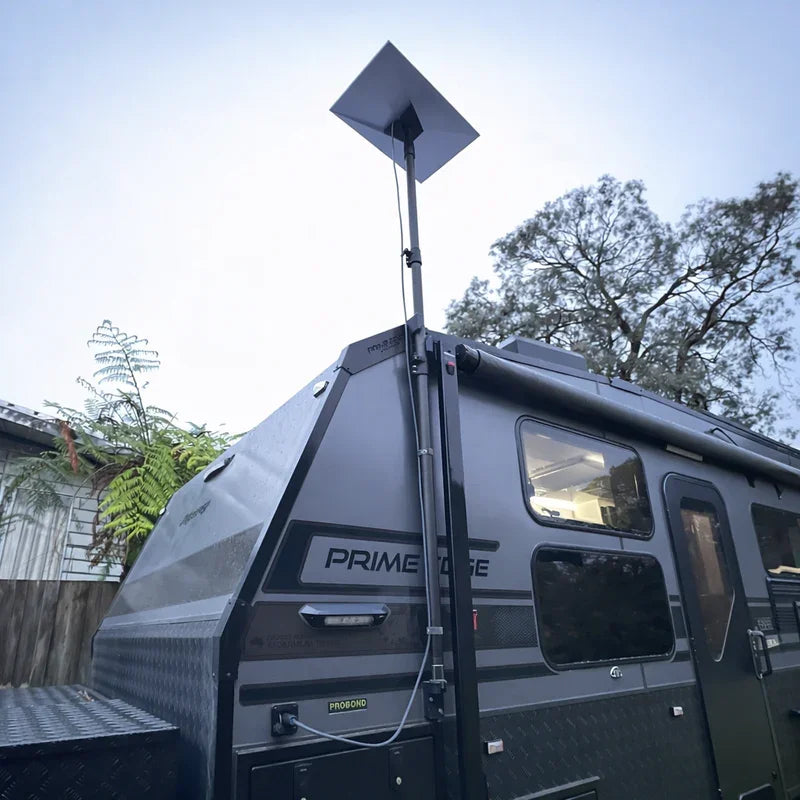
A fixed wall installation is designed for a building, not for constant vibration on corrugated roads or movement at sea. Mobile rigs, caravans, 4WDs, trailers, and boats introduce extra vibration, flex, wind loading, and salt exposure that a standard residential wall mount may not be built to handle.
For mobile Starlink setups, use hardware designed for that job rather than trying to adapt a wall mount beyond its purpose. The right setup should suit the vehicle or vessel, hold firm under movement, and keep the dish profile sensible for travel.
Important mobile considerations include:
- Vibration resistance: Mobile mounts need secure locking hardware and clamps that will not back out under road vibration.
- Off-grid power: For caravans, touring vehicles, and remote worksites, DC-to-DC power is generally a better fit than an AC inverter because it can reduce power conversion losses, lower overall draw, and support custom network setups that bypass the standard Starlink router.
- Lower wind profile: A tall fixed mast can catch wind on a moving vehicle, while purpose-built mobility mounts are designed to sit more neatly against roof racks or vehicle surfaces.
Frequently Asked Questions About Rustproof Starlink Wall Mounts
Does a Starlink Wall Mount Need Extra Rustproofing or Sealant?
Yes. Even when the mount itself has a corrosion-resistant finish, the wall penetrations still need sealing. Use exterior neutral-cure silicone inside and around every pilot hole, then protect exposed fastener heads so water cannot sit in the threads.
What Should You Do if Your Wall Mount Shows Signs of Corrosion?
If you spot light surface oxidation on fasteners, replace the affected hardware with suitable corrosion-resistant alternatives. Clean the area with mild detergent and a soft brush, let it dry, then protect any exposed metal with a suitable primer and UV-stable topcoat if the manufacturer’s finish has been damaged.
How Does Marine Salt Spray Affect Starlink Mounting Hardware?
Airborne salt can hold moisture against metal surfaces and speed up corrosion, especially where different metals touch. In coastal conditions, unsealed screws and unprotected metal surfaces can seize or weaken sooner than expected. Protective coatings, isolation washers, and regular freshwater rinsing all help reduce the risk.
Keep Your Starlink Wall Mount Solid in Australian Conditions
A reliable satellite internet connection starts with a secure, weather-resistant physical setup. By choosing quality materials, sealing every wall penetration, and checking the mount now and then, you protect both the building and the dish from avoidable wear.
At SpaceTek Australia, we build Starlink mounting gear for harsh local conditions, from regional homesteads and sheds to coastal properties and worksites. Explore our range of house Starlink mounts and accessories to keep your connection secure year after year.

Leave a comment
This site is protected by hCaptcha and the hCaptcha Privacy Policy and Terms of Service apply.