
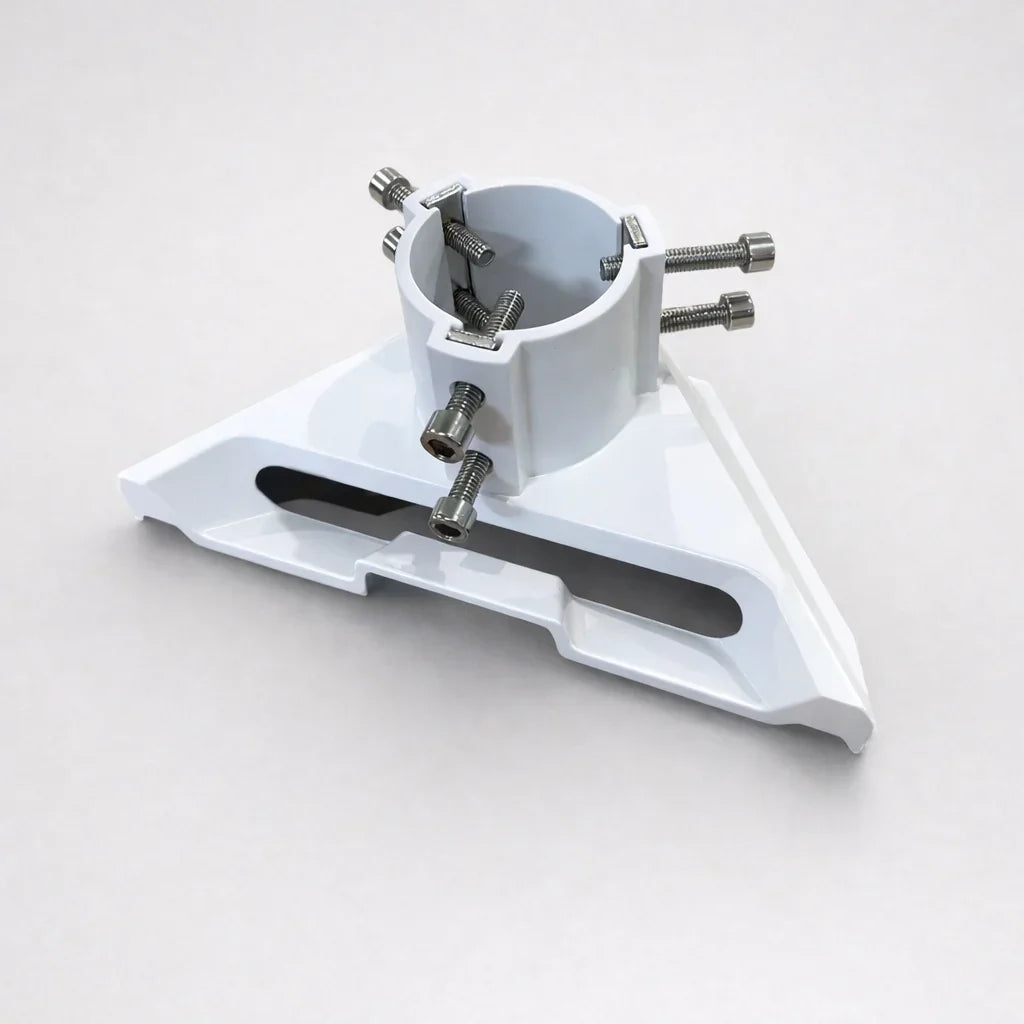
A Starlink Mini pipe mount lets you attach your Starlink Mini dish to a pole, mast, caravan rail, or suitable roof-rack tube so it sits higher, steadier, and clear of obstructions. For most Australian touring, boating, and off-grid property setups, it is one of the simplest ways to get a more reliable connection without overcomplicating the install.
Key Takeaways
- A Starlink Mini pipe mount replaces the kickstand and lets the dish sit securely on a compatible pole or tube.
- The official Starlink Mini pipe adapter suits standard poles, while premium Starlink mounts can offer more flexibility for caravans, 4WDs, boats, and camp setups.
- Route the DC power cable through the dish mount before locking the adapter into the dish, otherwise you may need to pull it apart and start again.
- Use the Starlink app to check for obstructions and fine-tune alignment before tightening everything fully.
- For Australian conditions, choose rust-resistant hardware and UV-stable materials that can handle heat, dust, rain, and coastal air.
What Is a Starlink Mini Pipe Mount and How Does It Work?
A Starlink Mini pipe mount is a dedicated adapter that lets you attach your Starlink Mini dish directly to a pole or pipe instead of relying on the built-in kickstand. That gives you a more stable, elevated setup whether you are at a rural property, parked up in the caravan, or setting up near the water.
Here is the basic process:
- Remove the kickstand from the base of your Starlink Mini by squeezing the release tab.
- Attach the pipe adapter to the dish base in place of the kickstand.
- Route the DC power cable through the dish mount opening before connecting it to the dish.
- Slide the adapter onto your pipe, pole, or compatible tube and tighten the attachment screw with a hex key.
- Use the Starlink app to check for obstructions and confirm proper alignment.
That is the core process, and for most setups it takes less than 30 minutes with basic tools.
Whether you are on a rural block trying to get reliable internet for the first time, or you are a seasoned caravanner chasing signal across remote Australia, a pipe mount is often the most practical way to get your Starlink Mini up high with a clear view of the sky. The official Starlink Mini pipe adapter suits poles between 31 mm and 50.8 mm in diameter, while premium aftermarket options from SpaceTek Australia can add useful features such as multi-angle positioning and tough materials built for harsh Aussie conditions.
How Do You Choose the Right Starlink Mini Pipe Mount?
Once you decide to get your dish off the ground, you have two main options. You can use the standard OEM Starlink Mini Pipe Adapter and Flat Mount, or you can choose a premium aftermarket Starlink mount that better suits your vehicle, caravan, boat, shed, or touring setup.
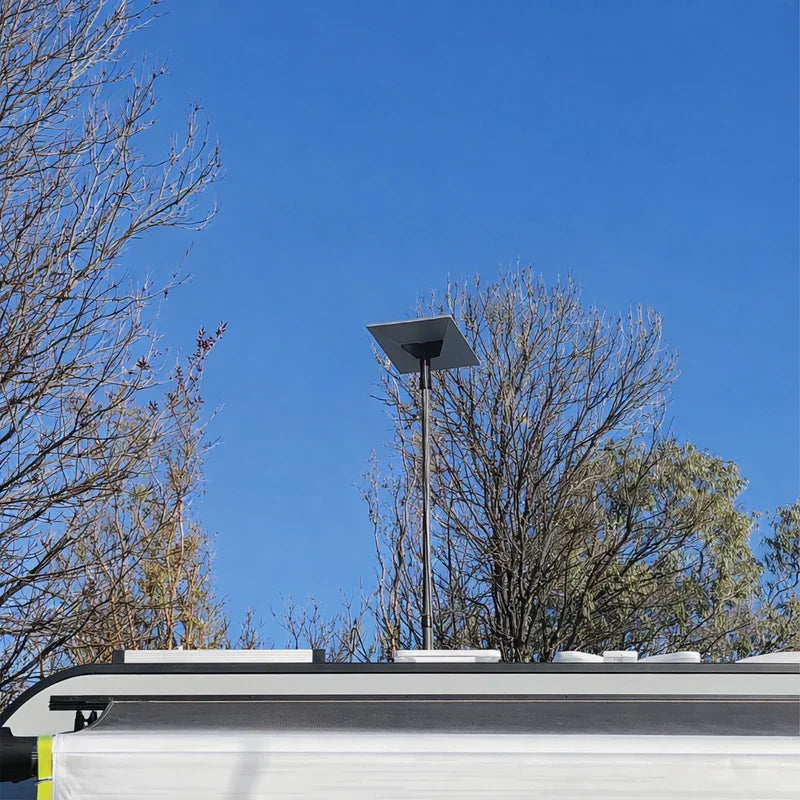
Getting the dish elevated is one of the best ways to reduce dropouts caused by trees, buildings, parked vehicles, or campsite clutter. When you are exploring the best Starlink Mini mounting options, think about where the dish will actually live. Will it go on a permanent mast at a rural property, clamp to a caravan ladder, sit on a roof rack, or move between different campsites?
Each setup needs a slightly different mix of strength, adjustability, weight, and convenience.
What Is the Difference Between OEM and Aftermarket Starlink Mini Pipe Mount Options?
The official OEM accessory is a combined pipe adapter and flat mount. It is a lightweight, compact option that does the job well for standard pole installations. It is especially handy when you already have a suitable mast and simply need a clean way to attach the dish.
Premium aftermarket Starlink mounts are worth considering when your setup is less straightforward. Australian conditions can be rough on gear, especially when you add heat, UV, dust, corrugations, salt air, and regular pack-downs.
- Material quality matters. Cheaper third-party options can warp or crack if they are not made for harsh outdoor use. SpaceTek options focus on precision-machined or folded aluminium and reinforced composite components suited to Australian conditions.
- Adjustability can make setup much easier. Multi-angle positioning helps when you are parked on uneven ground and need to fine-tune the dish without shifting the whole vehicle or pole.
- Versatility is useful if you move between a caravan, 4WD, boat, shed, and camp setup. A more flexible mounting system can reduce the need to carry multiple separate dish mounts.
For detailed official specifications, you can refer to the Mini Pipe Adapter And Flat Mount Installation Guide.
What Pipe Diameters and Materials Work Best?
Before buying any dish mount, make sure it actually fits the pole or tubing you want to use.
- Standard poles: The official Starlink Mini Pipe Adapter is designed to clamp onto standard mounting poles with an outer diameter ranging from 31 mm to 50.8 mm. This suits many home antenna masts and heavier structural poles.
- Smaller tubing and roof racks: If you are mounting to a caravan ladder, roof-rack crossbar, or bull bar, check the exact outer diameter before ordering. Some aftermarket clamp-style Starlink mounts are built for smaller tubing and may include protective shims to reduce movement and help prevent scratches.
- Material compatibility: Rust-resistant materials are the safer choice outdoors. Galvanised steel, anodised aluminium, and stainless steel are generally better suited to Australian rain, dust, and coastal salt air than untreated mild steel.
If you want to go deeper into pole setups, SpaceTek has a guide on installing your Starlink Mini on a pole.
How Do You Install a Starlink Mini Pipe Mount?
Installing a Starlink Mini pipe mount is a straightforward job, but it is worth slowing down during cable routing and final tightening. A neat install helps prevent dropouts, cable strain, and movement when the wind picks up.
How Should You Prepare the Dish and Route the DC Power Cable?
Before you climb onto a roof, reach up to a rack, or work around a pole, prepare the dish on a clean, flat surface.
- Turn your Starlink Mini face down on a soft towel.
- Locate the release tab at the bottom of the kickstand, squeeze it, and slide the kickstand away from the dish body.
- If you are using the OEM dish mount, remove the built-in hex key from the mount body so it is ready to use.
- Thread the power cable through the central opening of the pipe mount before plugging it into the dish.
- Push the waterproof DC power plug firmly into the Starlink Mini power port until it sits flush.
- Slide the pipe adapter into the slot where the kickstand used to be, then push until the locking tab fully engages.
The cable step is the one people most often miss. If the cable is not routed first, you may not be able to feed the connector through once the adapter is attached.
For more detail on power and fitment, read SpaceTek's guide to Starlink Mini power and mount compatibility.
How Do You Secure the Mount and Align the Dish?
Once the dish is prepared and the cable is connected, you can fit it to the pole or tube.
- Loosen the clamp screw on the pipe mount so it can slide easily over the pole or tube.
- Slide the mount fully into position so the dish weight is supported evenly.
- Hand-tighten the screw enough to stabilise the dish while still allowing small alignment adjustments.
- Connect your power source and let the Starlink Mini boot up.
- Open the Starlink app and run the obstruction tool to check that the dish has a clear view of the sky.
- Rotate or adjust the dish until the app confirms the alignment is suitable.
- Tighten the clamp firmly, without over-tightening plastic components.
- Secure the power cable to the pole or rack with weather-resistant cable ties so wind movement does not strain the connector.
For additional official setup steps, you can download the Starlink Mini Setup Guide.
Why Does DC Power Matter for Mobile and Off-Grid Setups?
If you are mounting your Starlink Mini to a caravan, 4WD, boat, or remote shed, how you power the system matters just as much as where you put the dish.
Many people start by plugging their Starlink power supply into a traditional 240V AC inverter. That can work, but it is not the most efficient way to run a mobile setup. An inverter converts battery power up to AC, then the Starlink power supply converts it back down again. That extra conversion adds unnecessary draw and wastes useful battery capacity as heat.
At SpaceTek Australia, we focus on DC-to-DC power solutions designed to make off-grid Starlink setups simpler and more efficient:
- The StarPower range includes StarPower V2, StarPower V3, and StarPower V4 options for compatible Starlink setups.
- Direct DC power can reduce battery draw compared with running through an AC inverter.
- A DC-to-DC setup can also help users bypass the standard Starlink router when they want to integrate Starlink into a custom caravan, 4WD, boat, or remote-property network.
Pairing a rugged pipe mount with a suitable DC power solution gives you a cleaner, more practical setup for touring, camping, boating, or working off-grid in Australia.
Common Questions About Starlink Mini Pipe Mounting
Can You Use a Pipe Mount While Driving or Boating?
Standard pipe mounts and OEM adapters are designed for stationary use. They can be secure when parked or set up at camp, but high-speed wind loads, vibration, branch strikes, and rough-road movement can put too much stress on a standard pole-style setup.
If you want to use your Starlink Mini while driving or while underway on a boat, look at a dedicated low-profile mobility dish mount instead. A flatter setup can reduce wind resistance and keep the dish more securely attached to the vehicle or vessel.
What Tools Do You Need to Install the Pipe Adapter?
If you are using the official OEM kit, the only tool you usually need is the included hex key, which tightens the clamp screw.
If you are mounting the pipe adapter to a flat surface or installing a custom pole, you may also need:
- a drill and suitable drill bits for your surface or fasteners
- a marker pen for pilot-hole alignment
- outdoor-grade silicone sealant for any roof, caravan, or canopy penetrations
- cable ties or clips rated for outdoor use
How Does the Starlink Mini Handle Australian Weather?
The Starlink Mini has an IP67 dust and water resistance rating, so it is built to handle dust, rain, and outdoor use. That said, the dish is only one part of the setup.
Your mounting hardware needs to be tough as well. Standard steel screws can rust, and low-grade plastics can degrade under strong Australian UV. Choosing precision-machined or folded aluminium, reinforced composite components, and corrosion-resistant fasteners helps the whole installation last longer in heat, dust, rain, and coastal air.
Get a Reliable Starlink Mini Setup for Australian Conditions
Installing a Starlink Mini pipe mount is one of the most practical upgrades you can make to a portable internet setup. By lifting the dish onto a secure pole, mast, caravan rail, or roof-rack tube, you reduce obstructions, protect the dish from ground-level hazards, and give yourself a better chance of a stable connection.
At SpaceTek Australia, we design and supply premium Starlink mounts and DC-to-DC power solutions for Australian touring, camping, boating, and remote-property use. If you need help choosing the right setup, contact SpaceTek Australia for custom Starlink setups and our local team can help you get the right gear for the way you travel, work, or live off-grid.


Leave a comment
This site is protected by hCaptcha and the hCaptcha Privacy Policy and Terms of Service apply.