
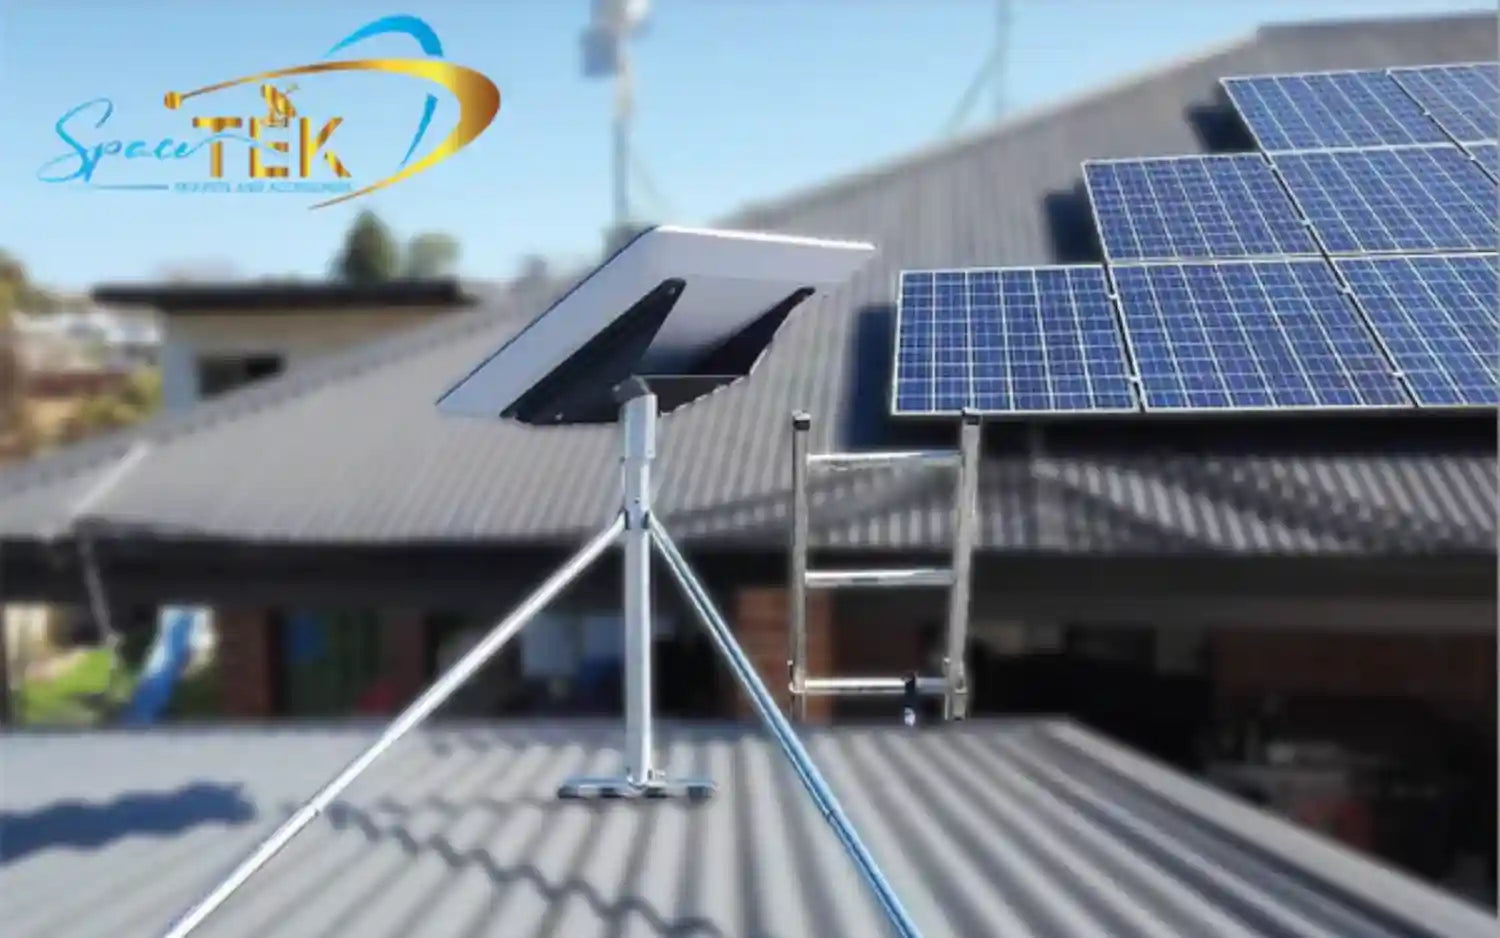
Is a Starlink Ground Mount Right for Your Property?
A Starlink ground mount places the antenna on a dedicated pole or support installed in the ground. It can be a practical alternative when a roof or wall location is unsuitable, provided the site has the required view of the sky and the foundation, pole, cable route, and antenna connection are suitable for the exact Starlink model.
Here is the basic installation sequence:
- Choose the location: Use the Starlink app's obstruction tool at the proposed antenna height and check the planned cable route.
- Plan the foundation: Select a footing appropriate for the mount, soil, frost depth, drainage, wind exposure, snow conditions, and local requirements.
- Locate utilities and excavate: Contact 811 before digging and wait for the required utility responses. Arrange separate locating for any private lines that 811 does not mark.
- Set and brace the pole: Follow the mount and concrete manufacturers' instructions, verify the required position with a level, and allow the foundation to cure before loading it.
- Protect the cable and install the antenna: Route the approved cable without crushing, kinking, or abrading it, connect it fully, secure the antenna as instructed, and complete alignment in the Starlink app.
A ground mount may improve access for inspection and avoids making mounting penetrations in the dwelling. It is not automatically the best location, however. Trees, buildings, future vegetation, vehicles, people, animals, snow accumulation, sprinklers, standing water, and overhead or underground utilities can all affect site selection.
Starlink equipment is intended to be installed using the instructions for the applicable hardware. If excavation, concrete work, electrical or communications wiring, structural design, or weather exposure is outside your experience, use an appropriately qualified local professional.
What Is a Starlink Ground Mount and When Should You Use It?
A permanent ground mount normally consists of a compatible antenna connection, a pole or mast, and a foundation or support system. Some products are designed to be embedded in concrete, while others attach to a separately designed footing. Do not assume that every pole, adapter, or Starlink generation uses the same installation method.
A ground-mounted installation can offer several practical benefits:
- Accessibility: The antenna may be easier to inspect than one mounted high on a roof. Disconnect power before handling or cleaning equipment, and do not touch it during a storm.
- No mounting penetrations in the dwelling: The pole is structurally independent of the roof or wall, although the cable may still require a properly detailed building entry.
- Flexible placement: A pole can sometimes be positioned beyond nearby rooflines or other obstacles, subject to property boundaries, utility clearances, cable limits, and local rules.
Ground clearance depends on the selected product and installation. Confirm the dimensions of the mount and antenna before relying on a quoted height. In areas with deep snow, drifting, flooding, tall vegetation, livestock, or frequent yard activity, additional clearance or a different mounting location may be necessary.
For an overview of other options, see our Starlink mounts complete guide.
Ground Pole Mount vs. Roof and Wall Mounts
Roof and wall mounts can elevate an antenna above nearby obstacles, but they require a structurally suitable attachment and careful weatherproofing of any penetrations. Roof access also introduces fall hazards. A ground mount avoids loading the dwelling but requires excavation, a suitable foundation, cable protection, and protection from ground-level activity.
A lower mounting position does not automatically mean a lower wind load, and concrete alone does not establish a wind rating. Pole height, antenna area, footing design, soil, exposure, hardware, and installation quality all matter. Starlink installation literature warns that some mounts are not designed for hurricane or tornado wind loads. Have exposed or high-wind installations assessed by a qualified local contractor or engineer, and follow any model-specific tethering instructions.
For Starlink Mini hardware, consult the manufacturer's Mini pipe adapter and flat mount installation guide. Use the official guide for your exact antenna and mount rather than transferring Mini instructions to another model.
Planning Your Starlink Ground Mount Installation
A permanent installation should begin with a site survey. Check sky visibility, the anticipated cable route, drainage, frost conditions, snow accumulation, wind exposure, access, property boundaries, and the locations of overhead and underground utilities before buying materials or excavating.
Choosing the Best Location for Your Starlink Ground Mount Installation
Starlink needs a broad, clear view of the sky to communicate with satellites moving overhead. Trees, branches, poles, rooflines, and other obstructions in the antenna's required field of view can cause interruptions.
- Use the obstruction tool: Run the Starlink app's scan from as close as practical to the proposed antenna height and position. Compare more than one location if necessary.
- Follow model-specific alignment: Do not rely on a universal compass direction. Follow the app and the installation guide for your hardware; actuated and non-actuated antennas are installed differently.
- Allow for change: Consider tree growth, seasonal foliage, future construction, snowbanks, and anything else that may enter the field of view.
- Check setbacks and access: Keep the installation within the property and out of driveways, walkways, play areas, livestock routes, and locations where vehicles or equipment could strike it.
- Maintain utility clearance: Do not place the antenna, pole, cable, ladder, or tools near overhead electrical conductors. Ask the utility or a qualified professional to determine safe clearance where there is any doubt.
For more preparation guidance, see the Starlink mount installation safety checklist.
Height, Clearance, and Safety Requirements
Choose enough clearance for the antenna to remain above expected vegetation, snow, splash, and routine activity while staying within the limits of the selected mount. Do not assume that a nominal pole height provides the same antenna clearance after part of the pole is embedded.
Install and align the mount according to the guide for the exact product. Some Starlink antennas orient themselves, while others require manual rotation using the app's alignment tool. A pole that is out of position can prevent correct installation or place unintended loads on the mount.
Before any excavation, contact 811 or your state 811 center and wait until the required responses are complete. Utility markings are approximate and may not include owner-installed lines such as private electrical feeds, irrigation, propane, septic, or communications cables. Arrange private locating where needed and follow the excavation rules for your state and locality.
Grounding, bonding, surge protection, and lightning protection are not one-size-fits-all additions. Requirements depend on the equipment, wiring method, building, and local rules. Do not connect a pole casually to a grounding electrode or lightning-protection system. Ask a licensed electrician or qualified communications installer to assess the installation and follow the Starlink documentation and applicable local requirements.
How to Install a Starlink Ground Pole Mount in 5 Steps
The steps below describe the general workflow rather than a universal footing design. The mount manufacturer's instructions and any locally required foundation design take priority.
Tools and Materials Needed for a Starlink Ground Mount Installation
- The correct mount or adapter for your Starlink model
- Shovel or post-hole digger appropriate for the soil
- Concrete and reinforcement specified for the selected footing, if required
- Level and temporary bracing
- Outdoor-rated conduit, fittings, pull line, and warning tape where required for the planned cable route
- Compatible cable-entry, flashing, bushing, gland, or sealant components
- Eye, hand, foot, and hearing protection appropriate to the work
- Manufacturer instructions for the Starlink kit, mount, concrete, conduit, and cable
Do not estimate concrete quantities from a generic bag count. Calculate the footing volume after the required diameter and depth have been established.
Step-by-Step Ground Pole Installation Guide
For additional practical context, see our DIY Starlink pole mount guide, but use the current instructions supplied with your hardware for installation dimensions and assembly details.
Step 1: Select and Mark the Location
Confirm the location with the Starlink app, mark the proposed footing and trench, contact 811, and identify private utilities. Verify property boundaries and any permit, setback, easement, homeowners-association, or local installation requirements before breaking ground.
Step 2: Excavate the Footing
Excavate to the diameter and depth required for the mount, soil, frost depth, wind exposure, and local conditions. A generic 2-foot-deep by 1-foot-wide hole is not suitable guidance for every US site. Loose fill, expansive soil, saturated ground, slopes, deep frost, or high-wind exposure may require a different footing or professional design.
Step 3: Address Drainage and Set the Pole
Keep the finished footing from creating a depression that collects water. Use gravel beneath the footing only when it is part of the selected footing or drainage design; a loose gravel layer by itself does not guarantee protection from frost movement, corrosion, or settlement.
Position the pole as specified by the mount manufacturer. Keep concrete and debris out of cable paths, connectors, drainage openings, and any release mechanism.
Step 4: Place Concrete, Brace, and Cure
Mix, place, and finish concrete according to the concrete manufacturer's instructions. Check the pole on multiple sides and brace it so it cannot move. Protect the work from rain, freezing, excessive heat, pets, and accidental loading.
Do not install the antenna merely because the surface feels hard. Concrete cure and loading times vary with the product, mix, temperature, moisture, and footing design. Wait for the specified time before loading the pole.
Step 5: Route the Cable and Install the Antenna
Route the cable through the intended pole or conduit path without pulling on the connector, exceeding the cable manufacturer's pulling limit, or bending it tighter than the specified minimum radius. Use broad sweeps rather than sharp elbows and leave a service loop where appropriate.
With power disconnected, insert the connector fully and install the antenna and retaining hardware exactly as shown in the guide for your model. Restore power, complete setup, and use the Starlink app to check alignment and obstructions. Confirm that the antenna is secure before leaving the installation.
Protecting Your Cable and Maintaining Your Ground Setup
An exposed cable can be damaged by mowers, trimmers, vehicles, foot traffic, animals, ice, or abrasion. Plan the cable route as part of the installation rather than as an afterthought.
Cable Protection and Trenching Best Practices
- Use compatible materials: Confirm that the cable and any conduit or fittings are suitable for the environment and installation method. Do not direct-bury the cable unless Starlink explicitly identifies that exact cable as suitable for direct burial.
- Follow local burial requirements: Required cover varies with wiring type, conduit, voltage, location, vehicle loading, and local adoption. Do not rely on a universal 12-inch trench depth.
- Protect connectors: Size conduit and sweeps for the factory connector. Do not cut, splice, or force the cable unless the manufacturer provides an approved method.
- Control water: Outdoor conduit can collect condensation or water. Route and terminate it so water is not directed into the building or equipment, using fittings and drainage methods appropriate to the installation.
- Detail the building entry: Avoid hidden wiring and plumbing when drilling. Protect the cable from sharp edges with an appropriate bushing or gland, maintain the wall's weather barrier, and seal or flash the penetration using a system suitable for the wall assembly.
- Keep power and communications work within scope: Ask a licensed electrician or qualified communications installer to handle work that falls under local electrical, communications, fire-stopping, or building requirements.
Long-Term Maintenance and Weather Protection
Starlink hardware specifications and operating features vary by model. Snow-melt capability does not prevent snow burial or drifting, and no general statement about the antenna establishes a wind rating for the complete pole and foundation.
Inspect the installation periodically and after significant weather, without approaching it during unsafe conditions:
- Check for leaning, loose hardware, cracking, erosion, settlement, or standing water around the footing.
- Inspect accessible cable sections for abrasion, animal damage, crushing, UV deterioration, or failed support.
- Check that connectors remain fully seated and protected as required by the hardware instructions.
- Trim vegetation before it enters the antenna's field of view, without striking the pole or cable.
- Remove snow only when it can be done safely and without scraping, striking, chemically treating, or otherwise damaging the antenna.
If the pole moves, the footing cracks, the cable is damaged, or the app reports repeated alignment or obstruction problems, disconnect power if it is safe to do so and have the installation assessed before continuing to use it.
Powering an Off-Grid Ground Mount
An off-grid power system must match the input requirements of the exact Starlink hardware and any third-party equipment. Battery voltage, surge behavior, cable length, connector pinout, grounding, environmental protection, and overcurrent protection all require consideration.
SpaceTek Australia develops StarPower DC products for selected Starlink configurations. Compatibility and expected energy use must be checked for the particular Starlink generation, power source, router arrangement, and service environment. Do not bypass or modify Starlink power hardware unless the chosen equipment is designed and documented for that configuration. For product-specific assistance, use our contact page.
Frequently Asked Questions About Starlink Ground Mounts
Can I install a Starlink ground mount myself?
Some property owners may be able to complete a straightforward installation after reviewing the instructions and local requirements. It is not appropriate DIY work if you cannot safely locate utilities, excavate, design or place the footing, route the cable, weatherproof the building entry, or address electrical and structural issues. Starlink's installation literature advises users who are uncomfortable with any part of the process to contact a professional.
How Deep Should the Ground Pole Be Buried?
There is no safe universal depth. Use the dimensions specified for the chosen mount and foundation, then account for local frost depth, soil, drainage, pole height, antenna loads, and wind exposure. A local contractor or engineer should determine the footing where the manufacturer's documentation does not cover the site conditions.
What Is the Maximum Wind Rating for a Ground Mount?
A complete installation has a defensible wind rating only when the antenna, adapter, pole, fasteners, footing, soil, and exposure have been evaluated together. A pole set in concrete should not be described as hurricane-, tornado-, or high-wind-rated without supporting engineering or manufacturer documentation. Use a qualified professional for exposed or storm-prone sites and follow all current Starlink warnings and tethering instructions applicable to the hardware.
Does a Ground Pole Need to Be Grounded?
Do not assume that every pole requires the same grounding or bonding arrangement. The correct treatment depends on the Starlink equipment, cable, building electrical system, lightning-protection system, and locally applicable requirements. Have a licensed electrician or other appropriately qualified professional assess the installation. A separate ground rod or an improvised connection can be ineffective or hazardous if it is not designed and bonded correctly.
Building a Reliable Starlink Ground Mount Setup
A ground mount can be a useful solution when it provides the required sky view and can be installed away from hazards. Reliability depends on more than setting a pole in concrete: the footing must suit the site, the antenna and mount must be compatible, the cable must be protected, drainage and snow must be considered, and the installation must satisfy applicable local requirements.
Use the Starlink app before finalizing the location, contact 811 before digging, follow the current manuals for your exact hardware, and involve qualified local professionals when structural, electrical, communications, excavation, or weather-related conditions require them.
SpaceTek Australia designs and supplies Starlink mounting and power accessories. Review the relevant product specifications carefully before selecting a component for a US installation, and contact our team if you need help confirming hardware compatibility.

Leave a comment
This site is protected by hCaptcha and the hCaptcha Privacy Policy and Terms of Service apply.