
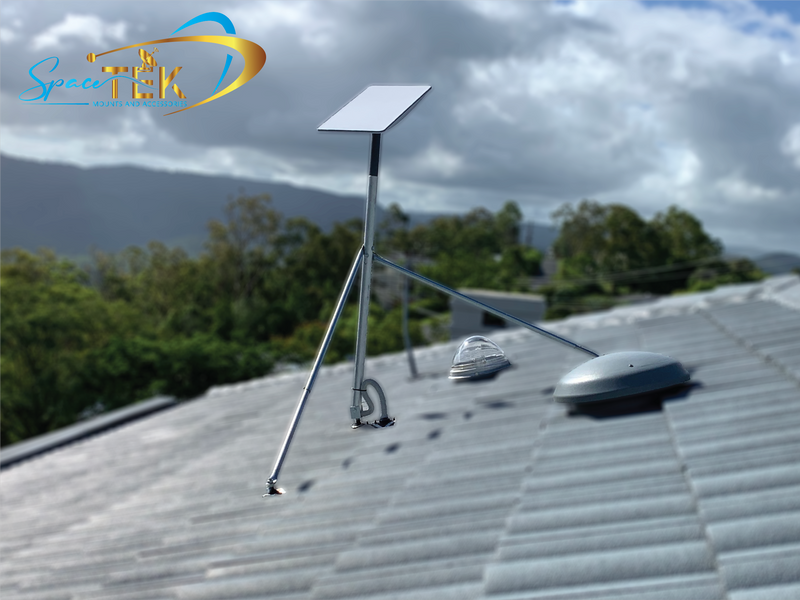
Where should I install my Starlink? For the best possible performance, your Starlink dish needs an unobstructed view of the sky. Here are some tips:
- Elevate your dish: Consider a suitable roof, pole, or wall location that provides a clear view of the sky.
- Avoid obstructions: Check that trees, buildings, power lines, and other structures do not block the dish's required field of view.
- Use the Starlink App: Use the app's obstruction-checking and alignment guidance when selecting and confirming a location.
SpaceX's Starlink uses a network of low Earth orbit satellites to provide internet service in locations that may have limited conventional options. Correct dish placement is an important part of a Starlink installation because obstructions can interrupt connectivity. Read on to compare roof, pole, and wall locations and learn how to check a proposed installation site.
Installing on corrugated metal roofing? See the Starlink Gen 3/V4 Metal Roof Mount Kit for a heavy-duty roof-mount option with pole adapter and stay bars. Confirm roof structure, sealing requirements and installer suitability before purchase.

Understanding Starlink Installation Requirements
To get the best possible results from your Starlink setup, understanding its installation requirements is key. The primary factor is a clear view of the sky.
Clear View of the Sky
Starlink works by communicating with satellites orbiting Earth. For the dish to maintain that connection, it needs the required unobstructed view of the sky. Obstructions such as trees, buildings, or tall power lines can interfere with service and may cause interruptions.
Obstructions: What to Look For
Before installation, survey your proposed location for potential obstructions. Branches and other objects that enter the dish's field of view can affect connectivity. Using the Starlink App can simplify this process. Its obstruction-checking tool helps identify barriers that may affect the proposed location.
Starlink App: Your Setup Companion
The Starlink App provides tools for evaluating dish placement and completing the setup process. It is available on iOS and Android. Here's how it can help:
- Check for Obstructions: Use the obstruction tool to evaluate the sky view from the exact place where you intend to install the dish.
- Alignment Assistance: Follow the in-app instructions for your Starlink hardware when confirming the dish's alignment.
Use the app's current instructions for your particular Starlink kit, as setup behavior and hardware features vary by model.

With these requirements in mind, you can compare installation locations and identify a suitable place for your dish. Next, we'll look at the practical differences between roof, pole, and wall mounting.
Where Should I Install My Starlink?
Using the Starlink App for Placement
When deciding where to install your Starlink, choose a location with the clearest practical view of the sky. Use the Starlink App from the exact proposed mounting point whenever it is safe to do so.
Elevated Location: Roof, Pole, or Wall?
For many users, an elevated location such as a suitable roof, pole, or wall can reduce obstructions from trees, buildings, and other structures. Each option has different structural, access, cable-routing, and weather-exposure considerations:
- Roof Mounting: A roof may provide a broad view of the sky, but the mount and attachment method must be appropriate for the roof type and local conditions. Avoid unsafe roof access and use a qualified installer where necessary.
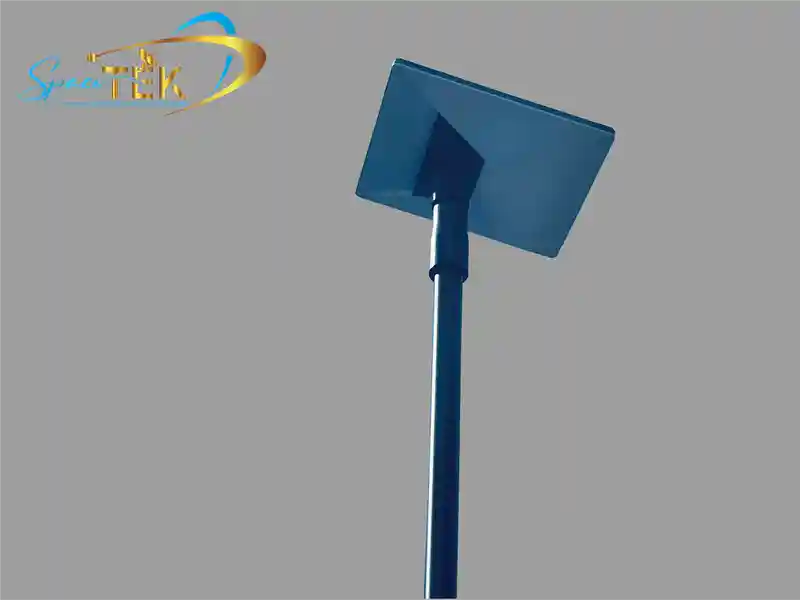
- Pole Mounting: A pole can provide flexible placement away from buildings or trees. The pole, footing, adapters, and fasteners must be suitable for the dish, soil or supporting structure, and site conditions.
- Wall Mounting: A wall can be practical where roof access is difficult or space is limited. Confirm that the dish has the required sky view and that the wall and fasteners can support the installation.
Check for Obstructions Tool
The Starlink App is the primary tool for evaluating a proposed installation spot. Use its Check for Obstructions feature and follow the current on-screen instructions to scan the required area of sky. Repeat the check from each location you are considering because even a short change in position can alter the result.
Alignment Tool
After selecting a location, follow the app's alignment instructions for your Starlink model. Some kits include actuated hardware that changes orientation automatically, while other models require manual positioning. Do not assume that instructions for one Starlink generation apply to another.
Roof, pole, and wall locations can all work when the dish has the required sky view and the mounting hardware is compatible with the Starlink model and supporting structure. Placement alone does not guarantee service performance; obstructions, equipment, weather, installation quality, and Starlink service conditions can also affect connectivity.
Next, we'll explore installation considerations for different environments so you can adapt the setup to your location.
Installation Tips for Different Environments
Starlink Installation in the United States
Whether you're in a city, a rural community, or a remote part of the United States, the same placement fundamentals apply. Adapt the installation to your surroundings and use the Starlink App to evaluate the required view of the sky.
Rural Properties
On rural properties, trees, hills, barns, and other structures can limit sky visibility. Installing the dish in a suitable elevated location—such as an appropriate roof or pole—may help avoid nearby obstructions. A North Carolina installation described by real estate expert Chris Miller is one US example of a rural household using Starlink where conventional internet options were limited.
Urban Settings
In urban areas, nearby buildings, trees, utility infrastructure, and restricted mounting space can complicate placement. Wall mounting may be practical if the wall provides the required sky view and is suitable for the mount and fasteners. Use the Starlink App to check each proposed location for obstructions.
Remote Areas
Remote locations can present limited infrastructure as well as practical installation challenges. Pole mounting can be useful where it provides flexible placement in an open area with a clear view of the sky. Before committing to a location, check for obstructions and confirm that the cable route, power availability, mounting surface, and maintenance access are suitable.
Remote Communities
For remote communities, internet access can support education, healthcare, work, and other services. Where Starlink service is available and suitable, correct dish placement remains important. SpaceTek's Starlink-compatible mounts include options for different mounting applications. Check each product page for supported Starlink models, materials, required components, and installation details.
Tailor the installation to the property rather than relying on a single mounting method for every environment. Whether the site is rural, urban, or remote, evaluate sky visibility, structural suitability, cable routing, weather exposure, and safe access before installation.
Next, we'll address common questions about Starlink installation.
Frequently Asked Questions about Starlink Installation
How do I check for obstructions?
Use the Starlink App to evaluate the view of the sky from your proposed dish location. Trees, buildings, power lines, and other objects within the required field of view can affect connectivity.
- Using the Starlink App: Open the app, select its obstruction-checking feature, and follow the current on-screen instructions. Perform the scan from the proposed mounting point whenever it is safe to do so. If the result shows obstructions, compare another location or consider an appropriate method of gaining elevation.
Do I need a permanent mount?
A secure mount is appropriate for a permanent outdoor installation. The mount should be compatible with your Starlink model, attachment surface, and site conditions. Temporary hardware supplied with some Starlink kits may not be intended for every permanent roof, wall, pole, vehicle, or marine application; follow the instructions provided for your specific kit.
- Elevated Location: Elevation may reduce obstructions, but it can also increase wind exposure and make installation or maintenance more difficult. Choose a location and mounting method that provide the required sky view without compromising structural suitability or safe access.
What are the best mounting options?
The best mounting option depends on your Starlink model, property, supporting structure, obstruction scan, cable route, and environmental conditions. Common options include:
Roof Mounts: Useful where the roof provides the required sky view. Select hardware suitable for the roof material and structure, and use appropriate sealing and flashing practices.
Pole Mounts: Useful for positioning the dish away from nearby obstructions. Confirm pole diameter, adapter compatibility, structural support, footing, and wind exposure.
Wall Mounts: Useful where a suitable wall provides a clear field of view. Confirm stand-off clearance, fastener type, supporting material, cable routing, and weather exposure.
Use the Starlink App to compare locations, then select hardware that is compatible with both your Starlink model and the mounting surface. Seek qualified installation advice if you are unsure about structural attachment, electrical safety, roof access, or local requirements.
Mounting Accessories for Demanding Outdoor Conditions
Outdoor Starlink installations can face heat, rain, wind, humidity, snow, ice, and coastal salt exposure, depending on the location. A suitable mount, compatible hardware, and correct installation help keep the dish securely positioned. SpaceTek Australia designs Starlink-compatible mounts and accessories with practical outdoor installation challenges in mind.
Why Choose SpaceTek?
SpaceTek Australia offers Starlink-compatible mounts for a range of installation types. Product materials and compatibility vary by mount, so check the individual product description against your Starlink model, intended mounting surface, and site conditions before ordering.
Corrosion-Resistant Material Options: Many SpaceTek mounts use corrosion-resistant materials for outdoor applications. Review the materials and finish listed on the relevant product page to determine whether a product is suitable for your environment.
Options for Different Environments: Consider wind exposure, precipitation, temperature, humidity, coastal air, safe maintenance access, and the strength of the supporting structure when choosing mounting hardware.
SpaceTek Mount Considerations
Stable Positioning: A correctly selected and installed mount helps keep the dish in position. Follow the product instructions and account for site-specific loads and conditions.
Model-Specific Compatibility: SpaceTek offers mounting options for different Starlink hardware generations. Confirm the exact model named on the product page before purchase.
Outdoor Material Choices: Select the material and finish that suit your environment, and inspect the installation periodically for movement, loose fasteners, wear, damage, or corrosion.
The right mounting solution can provide a secure foundation for your dish, but it does not guarantee internet availability, speed, or reliability. Dish placement, obstructions, installation quality, equipment, weather, network conditions, and the Starlink service available at the location can all affect connectivity.
Ready to review your Starlink mounting options? Explore SpaceTek's range of Starlink-compatible mounts, and check each product page for model compatibility, materials, included components, and installation details.

Leave a comment
This site is protected by hCaptcha and the hCaptcha Privacy Policy and Terms of Service apply.