
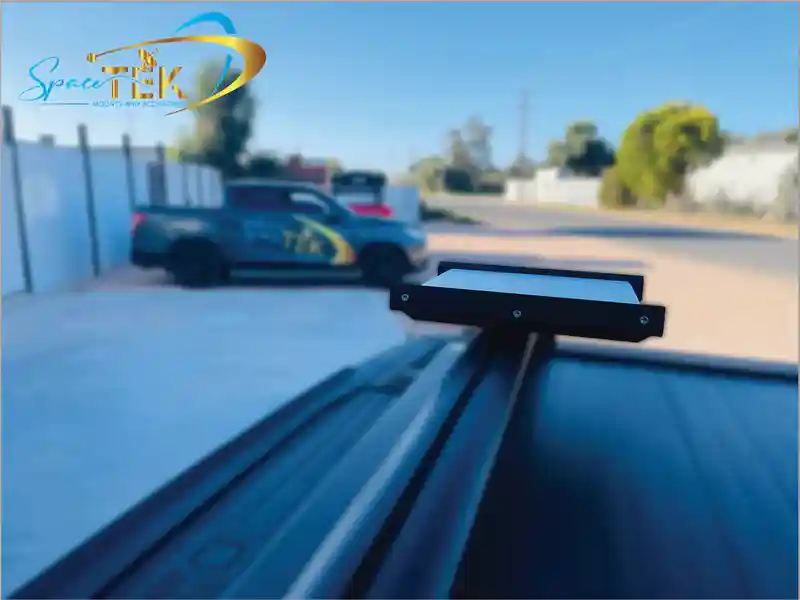
How to Set Up Starlink Mini in a Car Without the Headaches
Installing a Starlink Mini on a car, pickup, RV, or off-road vehicle starts with five essentials: a secure mounting location, a compatible mount, correctly sized and fused power wiring, protected cable routing, and a clear view of the sky.
Important: A parked setup and an in-motion installation are not the same. Do not assume a magnetic, suction, luggage-rack, or temporary mount is safe for highway use. For use on a moving vehicle, follow the instructions for a mount specifically intended for that application, attach it to a structurally sound surface, comply with applicable transportation rules, and confirm that your current Starlink plan and location permit in-motion service. Never install, adjust, or troubleshoot the system while driving.
Key Takeaways
- Match the mount to the use: A removable parked setup has different requirements from a permanently installed moving-vehicle system.
- Secure the hardware: Equipment that separates from a vehicle can cause serious injury or property damage.
- Plan power carefully: Starlink lists the Mini's input rating as 12–48V DC, 60W. Cable length, wire size, connectors, fusing, and voltage drop all matter.
- Protect the cable: Keep it away from heat, sharp edges, moving parts, airbags, pedals, door seals, and places where it can be crushed or pulled.
- Check the sky view: Trees, buildings, cargo, roof accessories, and other obstructions can interrupt service.
- Verify service eligibility: Plan names, data allowances, geographic coverage, and in-motion terms can change. Check your Starlink account before each trip.
Once you have tested your Starlink Mini at home, a vehicle setup can make it easier to connect from a campsite, remote job site, RV stop, or other location with limited conventional coverage. The Mini combines the Starlink antenna and Wi-Fi router in one compact enclosure, but it still needs a suitable installation and an eligible service plan.
The kit includes an AC power supply. A vehicle installation may instead use a compatible DC solution, but third-party power equipment must meet the Mini's electrical requirements. Starlink states that it guarantees performance only with the supplied Starlink power supply and cable, so consider that limitation before replacing either component.
Helpful reading: Starlink Mini Camping Setup
How to Set Up Starlink Mini in a Vehicle for Off-Grid Travel
Starlink Mini uses a phased-array antenna to communicate with satellites in low Earth orbit. It does not require the manual pointing process associated with many traditional satellite dishes, but it still requires the orientation and broad sky view shown in the Starlink app and the instructions for your mount.

A well-planned setup can support navigation updates, messages, remote work, and other online tasks where service is available. Starlink is not a substitute for emergency equipment, and satellite service can be interrupted by obstructions, weather, network conditions, power loss, hardware problems, or service limitations. Carry an appropriate backup communication method for remote travel.
If you want to review the basic setup process first, see How to Set Up Starlink Mini.
7 Steps to Install and Power Your Starlink Mini on the Road
Step 1: Choose a Mount for Parked or In-Motion Use
Decide whether the Mini will be deployed only after you park or remain attached while the vehicle moves.
- Portable ground or table setup: Often the simplest option at camp. Park safely, place the Mini where it has a clear sky view, secure it against movement, and protect the cable from people and vehicles.
- Magnetic or suction mount: Useful only within the mount manufacturer's stated surface, load, speed, weather, and installation limits. Unless the complete assembly is expressly rated and properly installed for moving-vehicle use, remove it before driving.
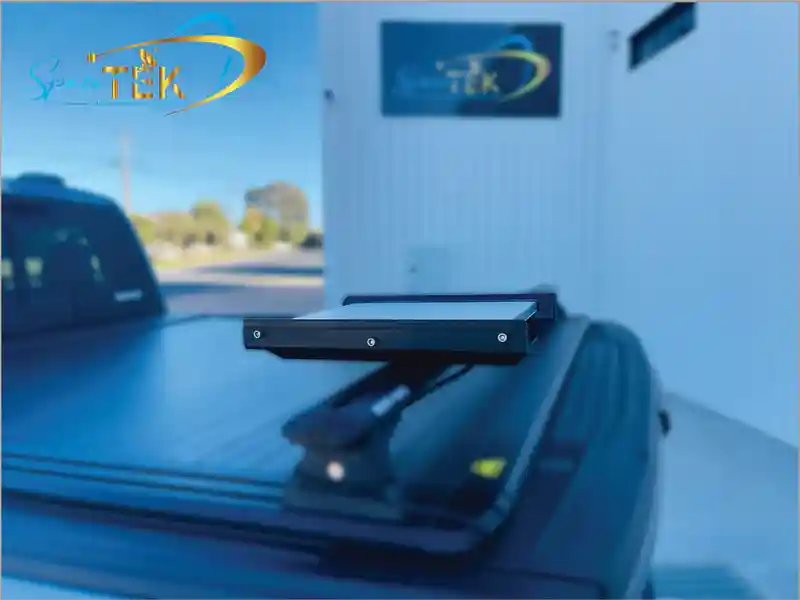
- Roof-rack or hard-mounted installation: Appropriate when the rack, mount, fasteners, and attachment points are compatible and rated for the application. Confirm vehicle and rack load limits and follow the mount manufacturer's instructions.
- Professional installation: Recommended if the work requires drilling the vehicle body, modifying a roof rack, accessing airbags or hidden wiring, or connecting to a permanent electrical circuit.
Do not attach the Mini to thin sheet metal, an unsupported trim panel, loose cargo, or another surface that cannot safely carry the mount and its road and wind loads. Do not position it where it blocks the driver's view, lights, license plate, cameras, antennas, safety equipment, or vehicle controls.
Step 2: Plan the Power Supply and Account for Voltage Drop
Starlink specifies a 12–48V DC, 60W input rating for the Mini. A vehicle's nominal 12V outlet is near the bottom of that range, so resistance in long or undersized wiring can leave insufficient voltage at the Mini. A loose accessory plug can also interrupt power.
Choose one of these approaches:
- Included AC supply and an inverter: Straightforward when you already have a properly installed inverter with sufficient capacity. Secure the inverter and power supply, provide ventilation, and keep AC connections dry.
- Compatible regulated DC supply: Can reduce conversion stages, but it must provide the voltage and power required by the Mini across the vehicle's operating-voltage range.
- Compatible USB Power Delivery source: Use only a source and cable that meet Starlink's current Mini requirements. Verify the required USB-PD profile in Starlink support before purchase.
The circuit should have an appropriately placed fuse or breaker, wire sized for the expected current and round-trip cable length, secure strain-relieved connectors, and a sound ground or return path. Do not bypass factory fuse protection or connect bare wires directly to a battery. Ask a qualified automotive or RV electrical installer to design permanent wiring if you are unsure.
For additional background, read the Starlink Mini Power Supply Guide.
Step 3: Run and Protect the Cables
Plan the entire route before drilling or removing trim.
- Keep cables away from exhaust components, engine heat, hinges, steering and suspension parts, sharp edges, and rotating equipment.
- Do not route a cable across pedals, controls, seat tracks, seat belts, or airbag deployment zones.
- Do not close a door, window, tailgate, or hood on the cable. Repeated crushing can damage insulation and conductors, and an improvised opening can allow water or exhaust gases into the vehicle.
- Use a purpose-designed cable entry, abrasion protection, grommet, strain relief, and appropriate sealing method where a cable passes through the body.
- Support exterior cable at suitable intervals with UV-resistant hardware that does not crush it. Keep it from flapping, chafing, or snagging on cargo and branches.
- Maintain the cable manufacturer's minimum bend radius and leave enough service slack for connection and removal without creating a loose loop in the wind.
- Before drilling, inspect both sides of the surface for wiring, airbags, fuel lines, brake lines, structural members, and other hidden components.
Step 4: Install the Mount and Mini Securely
Follow the instructions supplied with the exact mount. Use only the specified fasteners, washers, backing plates, torque, sealants, and orientation. Substituting generic hardware or guessing at torque can damage the mount, roof, rack, or vehicle.
The official Mini Mobility Mount instructions call for a structurally sound, horizontal mounting surface, correct orientation relative to the vehicle, a fully inserted power cable, and confirmation that the Mini has clicked securely into the mount. Installation details can vary between mount versions, so use the guide supplied with your product rather than relying on a generic procedure.
The Starlink Mini Mobility Mount is one vehicle-mount option. Confirm the current product specifications, included hardware, vehicle compatibility, and intended operating conditions before installation.
Shop the mount mentioned here: Review the Starlink Mini Mobility Mount before ordering and verify it suits your vehicle, installation method and intended parked or in-motion use.
After installation, inspect the assembly by hand while the vehicle is parked. Recheck it after the first trip and at intervals recommended by the mount, rack, and vehicle manufacturers. Stop using the mount if you find movement, cracking, corrosion, loose hardware, cable damage, or deformation.
Step 5: Check for Obstructions and Follow the App's Alignment Guidance
Open the Starlink app and use its obstruction and alignment tools from the actual installation location. Do not rely on a universal compass direction or guessed angle.
- Check whether cargo boxes, roof baskets, solar panels, air conditioners, antennas, trees, buildings, or overhangs enter the required field of view.
- Follow the required vehicle orientation shown in the instructions for your mount.
- If a shaded parking spot blocks the sky, consider a portable deployment in a safe, clear location after the vehicle is parked.
- Do not climb onto a vehicle roof or adjust exterior equipment beside traffic. Move to a safe location, power down as needed, and use appropriate fall protection or professional help.
Step 6: Configure Wi-Fi and Optional Ethernet
Starlink Mini has an integrated Wi-Fi router. After powering it on, follow the Starlink app to complete setup, name the network, and set a strong password. Keep the app and Mini firmware current.
Metal roofs, pickup caps, cargo bodies, and RV construction can reduce the Wi-Fi signal inside or around the vehicle. If you need a separate access point or router, confirm the current Ethernet and bypass-mode instructions for your Mini. The Mini setup guide warns that using a standard RJ45 Ethernet cable can reduce the product's environmental protection, so use the Starlink cable or another connection method specified for the required exposure.
Step 7: Verify the Current Starlink Plan and Usage Rules
Do not select a plan based only on an older article or another customer's subscription. Log in to your Starlink account and verify:
- whether your hardware is activated on the intended service line;
- whether the plan covers the destinations where you will travel;
- whether in-motion use is included, if you intend to use the Mini while the vehicle moves;
- any speed, geographic, land, coastal-water, or international restrictions;
- the included data, overage terms, billing, and pause or standby rules; and
- whether local laws or transportation requirements impose additional restrictions.
Residential service is intended for fixed-location use and should not be assumed to permit in-motion operation. Roam and Priority offerings can change, so the options displayed in your account and Starlink's current terms control.
Direct DC Power vs. an AC Inverter
An inverter converts vehicle DC power to AC so you can use the supplied Starlink AC power supply. A regulated direct-DC solution avoids that AC conversion stage, but neither method is automatically right for every installation.
- Inverter setup: Uses the supplied Starlink power supply, but requires a suitable inverter and creates an additional conversion stage.
- Direct-DC setup: Can be compact and efficient, but depends on third-party equipment, correct electrical design, and a compatible output.
- USB-PD setup: Can suit a portable installation when both the source and cable support the required power profile.
Compare the complete system rather than one component. Include idle draw, conversion efficiency, cable losses, connector security, heat dissipation, fuse protection, and the Starlink limitation that guaranteed performance applies to its supplied power supply and cable.
Connecting Starlink Mini to a 12V Vehicle System
- 12V accessory outlet: May suit a temporary parked installation if the outlet, plug, fuse, cable, and power converter are properly rated. Some outlets turn off with the ignition, and loose plugs can disconnect on rough roads.
- Secure DC connector: A suitable polarized connector can provide a more secure connection, but its rating, wiring, fuse, and installation still need to match the circuit.
- Auxiliary battery: Can help avoid discharging the starter battery. The battery management system, charger, low-voltage protection, wiring, and fuse must be designed for the load.
Do not assume a vehicle outlet can continuously deliver its labeled maximum, and do not replace a fuse with a larger one to stop it from opening. If the Mini reboots or loses power, stop and test the voltage at the load rather than repeatedly reconnecting it.
Protecting Your Starlink Mini in Vehicle Use
Vehicle-mounted equipment can be exposed to sun, rain, dust, road debris, vibration, branches, and wind loads. Install the Mini only within the environmental and mounting limits published for the hardware and mount.

- Keep connectors seated: Insert the power connector fully as directed and provide strain relief so cable movement does not load the port.
- Preserve drainage and airflow: Do not create a water trap, block vehicle drains, or wrap the Mini in a cover that was not designed for powered operation.
- Prevent impacts: Consider total vehicle height and remove or protect equipment before entering garages, parking structures, car washes, low branches, or other restricted-clearance areas.
- Inspect after severe conditions: Check the mount, cable, rack, and attachment points after rough-road travel, an impact, or severe weather.
- Remove loose equipment: Store portable mounts and cables securely before driving so they cannot become projectiles in a sudden stop or collision.
Mounting Starlink Mini on a Vehicle Roof Safely
- Confirm the roof or rack can carry the complete assembly under the intended static, wind, vibration, and road loads.
- Follow the vehicle and rack manufacturers' restrictions for drilling, clamps, adhesives, and accessory placement.
- Use the fasteners and retention method specified by the mount manufacturer; do not improvise a tether that could damage the vehicle or become another road hazard.
- Check final vehicle height and keep a written height reminder visible to the driver when appropriate.
- Never test mount security by driving until you have completed the installation and stationary inspection required by the manufacturer.
- If you experience connection or power problems, park safely before using the Starlink Mini Troubleshooting Guide.
Frequently Asked Questions About Vehicle Starlink Mini Setups
Can Starlink Mini Be Used While a Vehicle Is Moving?
Starlink permits Mini hardware for in-motion use only under current eligible service plans and in authorized locations. The Mini must be installed with an appropriate vehicle mount according to the manufacturer's instructions and applicable transportation rules. Service is not guaranteed, and the driver must not interact with the system while driving.
Can I Run Starlink Mini From a Vehicle Accessory Outlet?
Possibly, but not by connecting the Mini to an arbitrary 12V cable. The complete power path must provide a compatible regulated output and sufficient power at the Mini. Confirm the outlet rating, fuse, converter, connector, cable length, wire size, and voltage under load. Use a professional installer for permanent wiring or when the vehicle circuit is not clearly documented.
What Is the Difference Between the Built-In Router and a Third-Party Router?
The integrated router reduces equipment and wiring. A separate router or access point can improve network placement or add features, but it requires additional power, cabling, configuration, and weather protection. Follow the current Starlink instructions for Ethernet and bypass mode, and follow the third-party router manufacturer's setup guidance.
Can I Use a Magnetic or Suction Mount on the Highway?
Only if the complete mount is expressly designed and rated for that vehicle surface, equipment, speed, weather, and installation method. A magnet merely sticking to a roof or a suction cup holding while parked does not establish that it is safe for road use. When those requirements cannot be confirmed, remove the Mini and mount before driving.
Should I Leave Starlink Mini Powered From the Starter Battery?
Not without understanding the vehicle's battery capacity and low-voltage protection. Continuous loads can discharge a starter battery while parked. An appropriately designed auxiliary-battery system or automatic disconnect may be preferable for extended use; ask an automotive or RV electrical installer to assess your vehicle.
Get Your Starlink Mini Road-Ready
A dependable vehicle setup is not just a dish attached to a roof. It is a complete system: a compatible and securely installed mount, correctly designed power, protected cabling, suitable sky visibility, an eligible Starlink service plan, and regular inspection.
SpaceTek designs and manufactures Starlink mounts and power accessories for vehicle and portable installations. Product compatibility and installation requirements vary, so review the current product page and instructions before ordering or fitting any component.
Have questions about a car, pickup, RV, or off-road vehicle setup? Contact SpaceTek with your Starlink model, vehicle type, roof or rack details, intended parked or in-motion use, and power-system voltage.

Leave a comment
This site is protected by hCaptcha and the hCaptcha Privacy Policy and Terms of Service apply.