
What Are the Best Starlink Mini Dish Mounting Options for Aussie Touring Setups?
To mount a Starlink Mini without drilling, secure it to your vehicle, caravan, pole, or roof rack using a purpose-built dish mount that suits how you travel. For most Aussie touring setups, a no-drill roof rack Starlink mount, magnetic dish mount, suction dish mount, or pipe adapter gives you a secure fit without putting holes in your vehicle.
Key Takeaways
- The easiest way to mount a Starlink Mini is to match the dish mount to your setup: roof rack, caravan, pole, steel roof, glass roof, or temporary camp layout.
- No-drill roof rack Starlink mounts are a strong pick for 4WDs and touring rigs because they use existing rack channels instead of permanent holes.
- Magnetic and suction dish mounts are handy if you swap vehicles, travel in hire rigs, or want a tool-free setup that packs down quickly.
- Cable routing and a safety tether matter just as much as the dish mount, especially on rough tracks, in gusty weather, or around low branches.
- SpaceTek Australia’s Starlink Mini dish mounts are built for Australian touring conditions with rust-resistant, precision-machined or folded aluminium hardware.
The factory kickstand works well on a camp table or ground sheet, but it is easy to knock over in wind, uneven dirt, or busy campsites. If you want a setup that feels more secure on the road, it is worth stepping up to a dedicated Starlink mount that keeps the dish elevated, protected, and easier to pack away.
Good options include:
- Kickstand dish mount: Best for a quick static setup on stable ground when you are not dealing with wind or camp traffic.
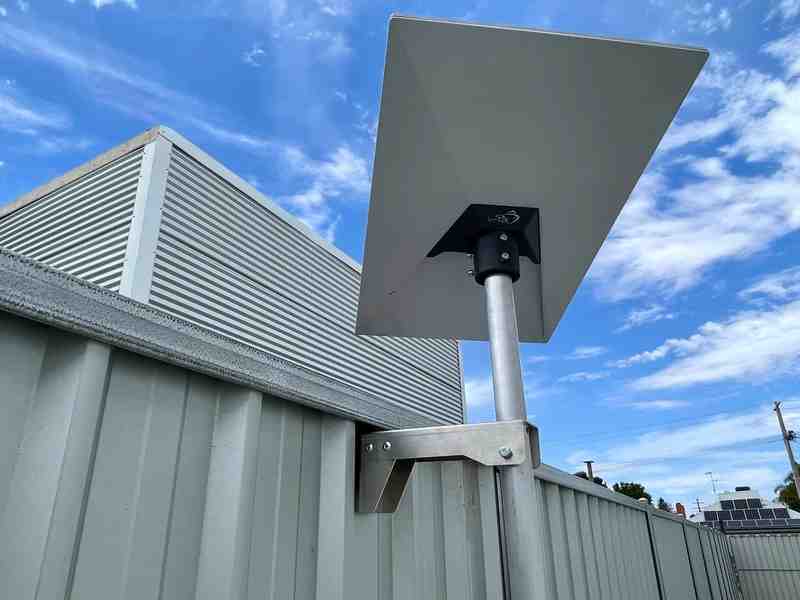
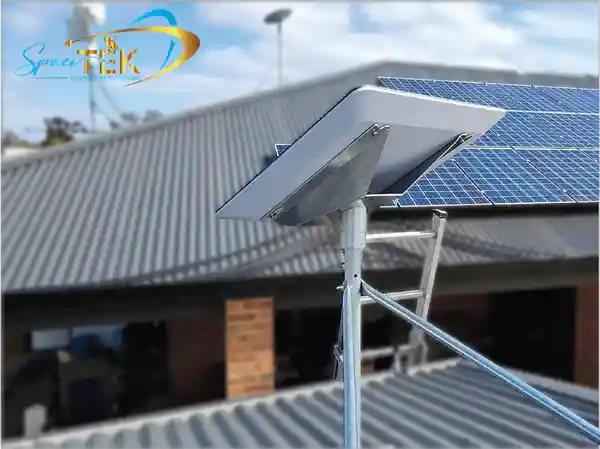
- Pipe adapter dish mount: Useful for poles, caravan jockey wheel mounts, or ladder rungs where you want the dish higher and clearer of nearby obstacles.
- Mobility Starlink mount: Designed to hold the dish low and secure on flat vehicle, canopy, or caravan roof surfaces.
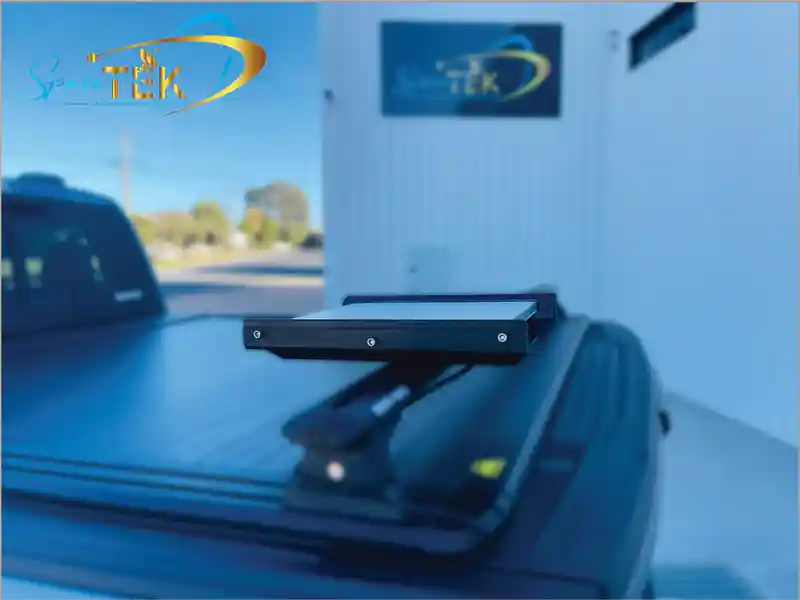
- No-drill roof rack dish mounts: Ideal for clamping to existing roof platforms, T-slot channels, or side rails without drilling into the vehicle.
- Suction dish mounts: A practical choice for smooth, non-porous surfaces such as glass roofs or polished fibreglass panels.
- Magnetic dish mounts: A fast, tool-free option for steel cabs or canopy roofs where you want strong holding power without permanent fasteners.
How Do You Mount a Starlink Mini on Vehicle Roof Racks?
Roof racks and tray platforms are some of the best mounting locations for 4WD touring and overlanding. Keeping the dish up high helps protect it from camp clutter and gives it a cleaner view over low scrub, awnings, and rooftop gear.
To mount a Starlink Mini to a roof rack without drilling, use heavy-duty crossbar clamps or T-slot channel connectors. Most modern 4WD roof platforms use T-slot extrusions, so T-bolts can slide into the aluminium channels and secure a folded aluminium dish mount in minutes.
When choosing hardware, stick with rust-resistant, powder-coated folded aluminium components. Australian coastal air, corrugated tracks, red dust, and rough weather are tough on low-grade fittings. A quick-release rack setup also makes it easy to unlatch the dish at camp if you need to move it away from trees or other obstructions.
How Do Magnetic and Suction Dish Mounts Work?
If you move between vehicles or want a completely tool-free install, magnetic and suction dish mounts are worth considering.
Magnetic dish mounts use heavy-duty earth magnets inside protective rubber-coated feet. The rubber coating helps protect the paintwork and gives the mount better grip against sideways movement. Place the mount flat on a steel ute cab or canopy roof, then check that the surface is clean before setting off.
For aluminium bodies, fibreglass camper shells, or glass sunroofs, industrial vacuum suction dish mounts are the better no-drill option. These use hand-pumped vacuum cups to pull a steady seal onto smooth surfaces.
Whichever option you use, add a physical safety tether between the dish mount chassis and a fixed point on the vehicle or rack. It is a simple backup that helps keep the hardware attached if a gust, branch, or rough section of track catches you out.
How Do You Mount a Starlink Mini Step by Step on an RV, Caravan, or 4WD?
Installing your dish on an RV, caravan, or touring rig is all about balancing clear sky access with good physical protection. You want the Starlink Mini high enough to see the sky, but tucked away enough that it is not the first thing hit by a branch, awning, or loose camp gear.
Before you lock in the layout, compare the common mounting styles:
- No-drill T-slot or rack clamp dish mount: Best for 4WD roof racks and overland rigs where you want a secure setup without changing the vehicle surface.
- Magnetic or suction dish mount: Best for quick transfers between steel cabs, glass roofs, fibreglass panels, and temporary travel setups.
- Direct bolt or screw Starlink mount: Best for semi-permanent installations where drilling is suitable and portability is not a priority.
For manufacturer installation details on standard flat or pole installations, check the official Starlink Mini mobility mount guide. For a practical no-drill vehicle setup, follow the steps below.
Step 1: How Do You Choose the Clearest Sky Position?
Start by finding a spot with the cleanest possible view of the sky. Starlink Mini needs a wide field of view, so avoid placing it hard beside roof-top tents, solar panels, awnings, air conditioning units, recovery tracks, or tall roof accessories.
- Open the Starlink App on your mobile device.
- Select the Obstructions tool and scan the sky above the vehicle.
- Check whether roof gear enters the highlighted scanning area.
- Move the dish mount location until the scan shows a clearer view.
- If you are fitting a mobility-style Starlink mount, point the vehicle orientation arrow toward the front of the vehicle where the product guide requires it.
Step 2: How Do You Remove the Kickstand and Fit the Dish Mount?
Before sliding the Starlink Mini dish into a SpaceTek dish mount housing, remove the factory desktop kickstand and work on a clean, soft surface.
- Turn the Starlink Mini face down on a clean microfibre towel so the dish face is protected.
- Find the kickstand release tab at the base of the rear connection housing.
- Squeeze the release tab inward and pull the kickstand arm straight out from the dish body.
- Line up the SpaceTek no-drill Starlink mount frame with the locking tracks on the dish.
- Slide the Mini into the dish mount housing until the integrated lock tab clicks firmly into place.
Step 3: How Should You Route the Cable Safely?
Cable routing is easy to overlook, but it makes a big difference to reliability. A tidy cable run helps protect the plug, prevents rubbing on sharp rack edges, and reduces the chance of rainwater tracking into the cabin.
Use the stock Starlink Mini DC power cable where it suits the layout, or choose a SpaceTek cable solution that matches your touring setup.
- Push the power cable connector firmly into the rear power port of the Starlink Mini.
- Make sure the plug sits flush with the surrounding housing so the seal can do its job.
- Protect exposed cable runs from UV, vibration, and sharp roof rack edges.
- Secure the cable along roof channels with suitable strain relief points.
- If the cable enters through a window seal or camper door, create a drip loop so rainwater does not follow the cable inside.
How Do You Power a Starlink Mini Efficiently Off-Grid?
Power management matters when you are running a Starlink Mini from an auxiliary battery system. The cleaner and more efficient the power setup, the less strain you put on your touring electrical system.
For off-grid use, direct DC-to-DC power is usually the smarter choice than running through an AC inverter. A StarPower DC power supply can help reduce conversion losses, lower the overall draw on your auxiliary battery bank, and allow custom networking setups that bypass the standard Starlink router where appropriate.
Your main off-grid power choices are:
- StarPower V2, V3, or V4 DC power supplies: A strong option for a cleaner, more efficient hardwired setup from an auxiliary power system.
- Heavy-duty DC vehicle socket: A practical option for simpler touring layouts, provided the socket and cable setup are suitable for continuous off-grid use.
- USB-C Power Delivery: Handy for light, portable setups where the power bank and cable are suitable for Starlink Mini operation.
If you are unsure which setup suits your vehicle, caravan, or camp power system, SpaceTek’s team can help you match the dish, cable, and power gear before you start pulling things apart.
How Do You Troubleshoot Alignment, In-Motion Connectivity, and Security?
Even with a solid dish mount, trees, roof gear, rough tracks, and poor positioning can still cause dropouts. The good news is that most issues are easy to sort once you know what to check.
If the Starlink App shows an alignment alert, tap the notification and open the live alignment tool. It will show which way to rotate or reposition the dish setup.
- For pole and pipe dish mounts, loosen the lower lock collar or hex screw, rotate the mast until the app indicator improves, then tighten it again.
- For flat vehicle dish mounts, alignment is usually more forgiving because the phased array antenna can electronically steer its signal across satellites overhead.
When using the dish on a moving vehicle, make sure the install complies with local road rules and keep a tethering safety line attached. A low, secure setup is better than a tall setup that catches wind or branches.
Security matters too. If you are leaving the vehicle unattended at a servo, campground, boat ramp, or public lookout, a quick-release dish mount can make life easier. You can unlatch the dish and store it inside the locked vehicle without undoing the entire cable run.
If connection issues continue, run through the Starlink Mini troubleshooting guide. If a reset is needed, follow the official process for your model and avoid forcing buttons, plugs, or cable connections.
What Do People Usually Ask About Starlink Mini Mounting?
Does Mounting a Starlink Mini Flat Affect Internet Performance?
Mounting the Starlink Mini flat on a roof rack or vehicle roof is a common touring setup and usually works well for everyday browsing, streaming, navigation updates, and remote work. The built-in phased array antenna can electronically steer its signal, which helps keep the setup practical for mobile and camp use.
Is a Standard Ethernet Cable Waterproof for Starlink Mini Setups?
No. A standard third-party RJ45 ethernet cable is not the same as the official Starlink Mini cable connection. Using an unsealed cable can compromise weather protection around the port, especially in rain, dust, or wash-down conditions.
Can You Operate a Starlink Mini on a Moving Vehicle?
Yes, as long as the dish is secured with robust hardware designed for dynamic vehicle use and your service plan supports in-motion operation. Keep the dish face positioned correctly, check your fittings regularly, and use a fail-safe tether every time.
What Is the Best No-Drill Starlink Mini Setup for Your Touring Rig?
For most Aussie travellers, the best setup is the one that suits your vehicle, your camp routine, and how often you need to remove the dish. A roof rack Starlink mount is ideal for a secure touring fit, while magnetic and suction dish mounts are better when you want fast, tool-free setup across different vehicles.
If you want a tidy, reliable installation, pair the right dish mount with careful cable routing and efficient DC-to-DC power. That gives your Starlink Mini a better chance of staying secure, powered, and ready when you pull up somewhere remote.
Ready to sort your setup properly? Explore SpaceTek’s Australian-engineered Starlink Mini gear or contact the team for practical mounting advice before your next trip.

Leave a comment
This site is protected by hCaptcha and the hCaptcha Privacy Policy and Terms of Service apply.