
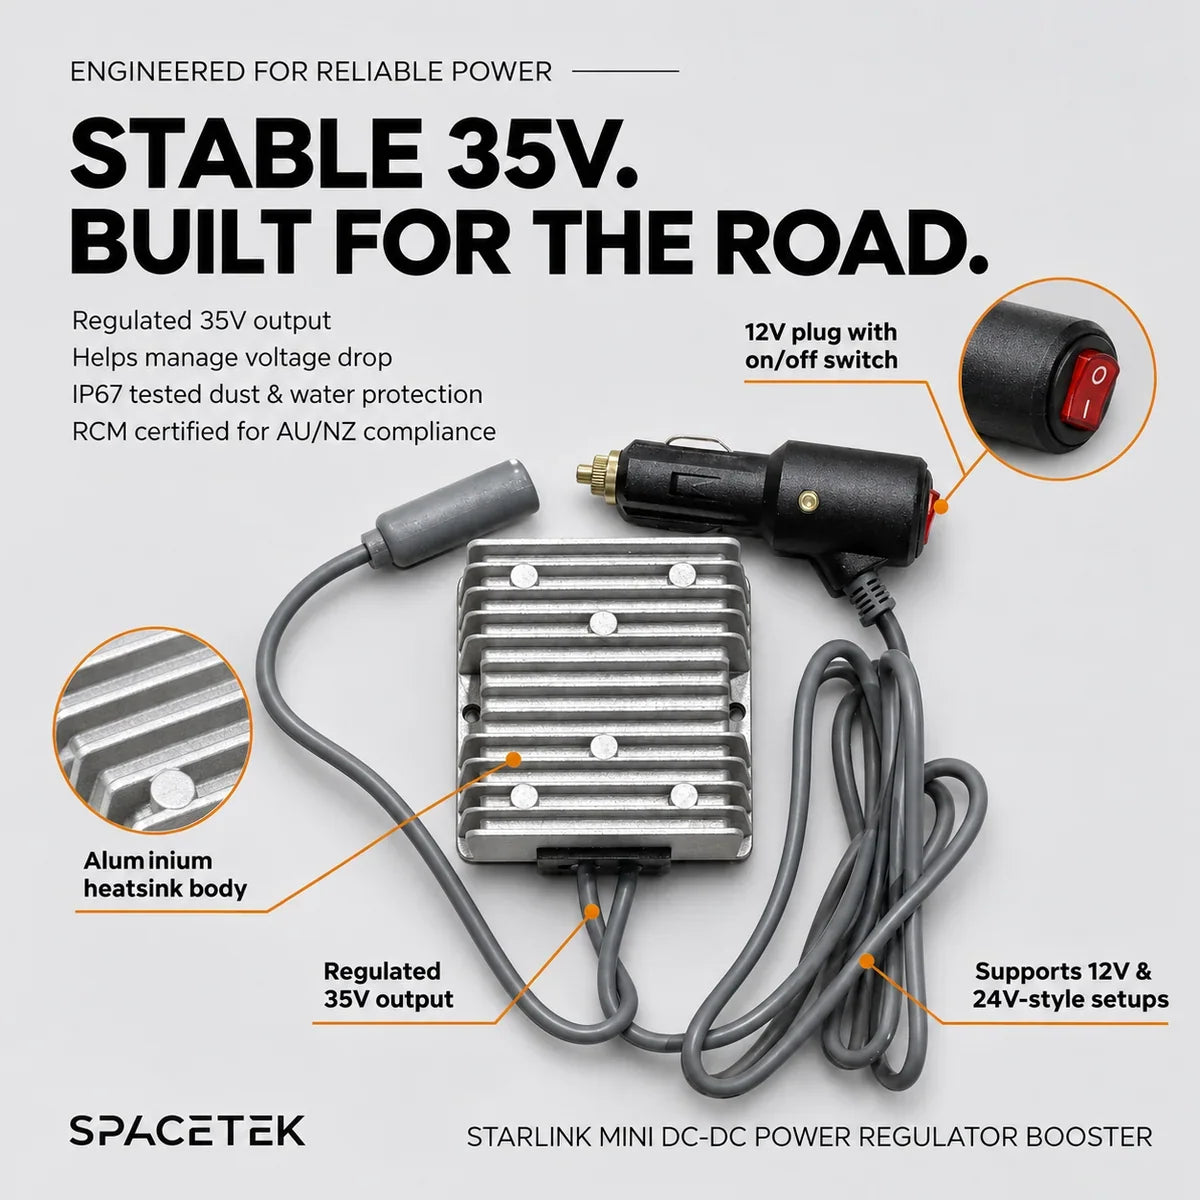
How do I power a Starlink Mini directly from DC?
To power a Starlink Mini directly from DC, connect the terminal to a compatible DC power source such as a 12V or 24V battery bank using a suitable power cable, verify correct connector polarity, install an inline fuse close to the battery, and use a dedicated DC-DC step-up regulator to maintain stable voltage delivery without an AC inverter.
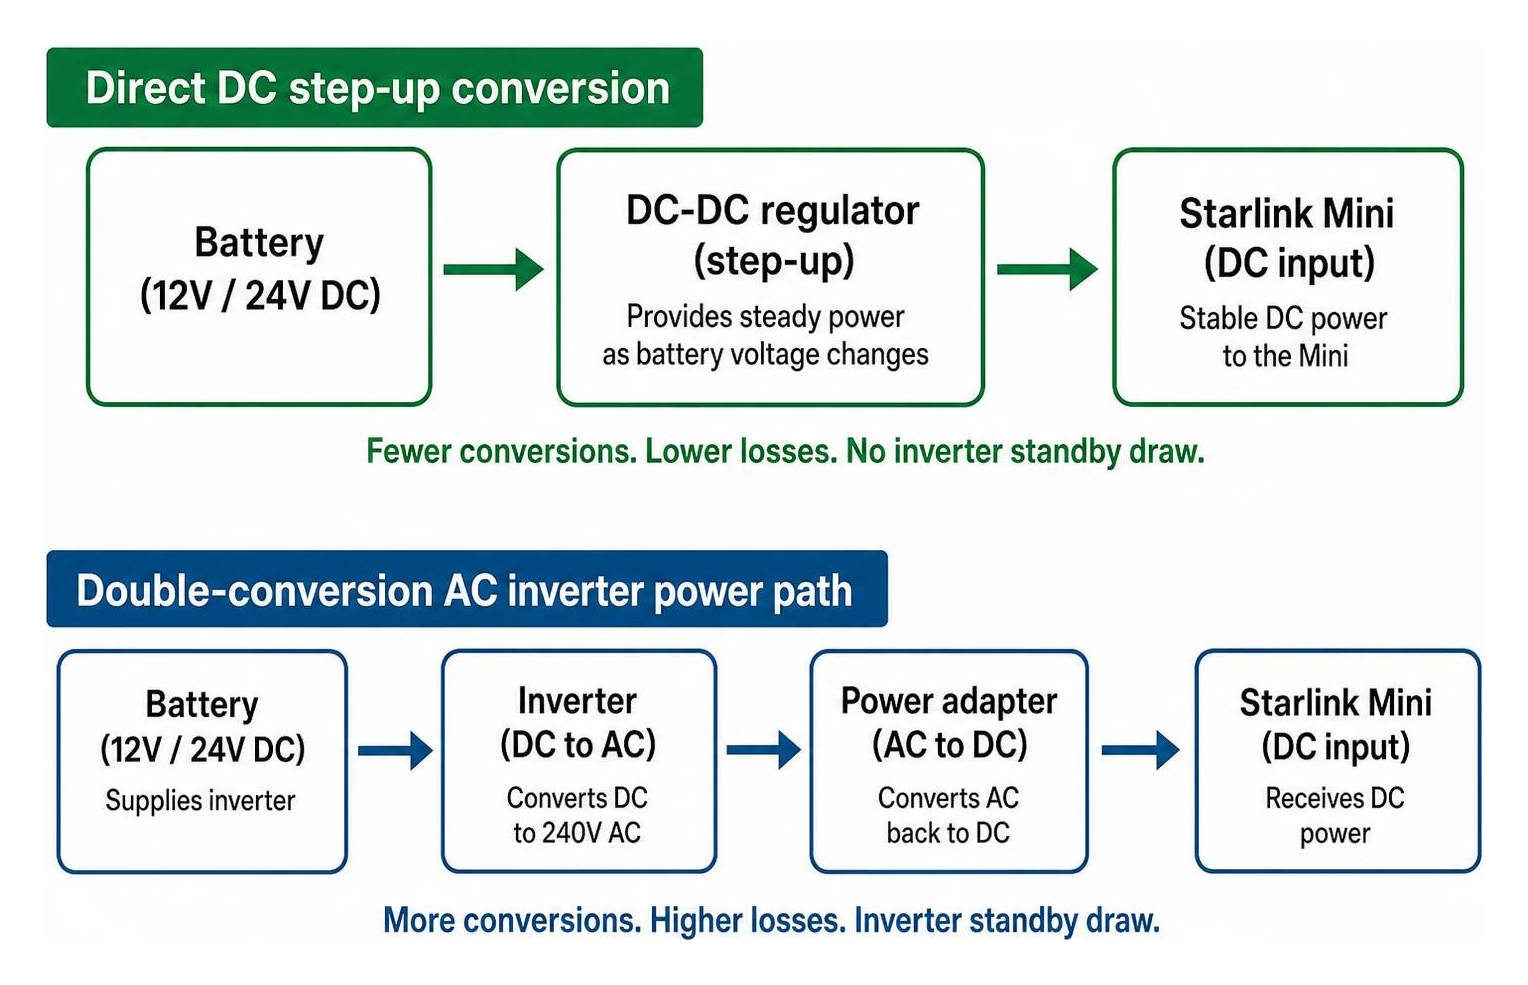
Direct DC power avoids inverter standby draw and eliminates unnecessary power conversion losses, delivering smooth, reliable operation off-grid as battery voltage fluctuates under load.
Hi, I'm Andrew Ziogas, managing director at SpaceTek Australia, and my background in technology consulting and practical satellite internet accessories informs how I approach Starlink Mini DC setups. I'll walk through the choices that make an off-grid installation easier to use and more reliable.
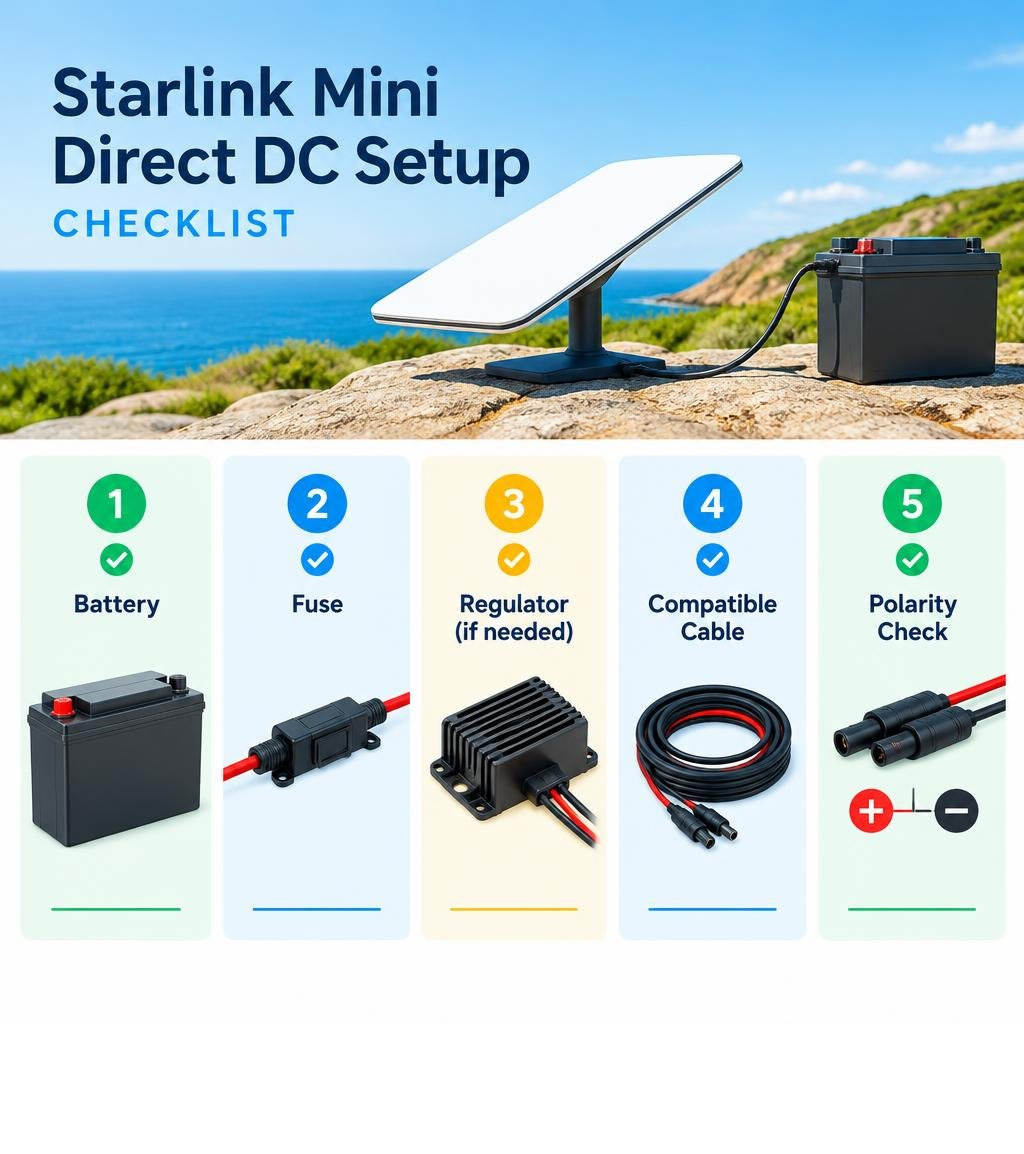
Starlink Mini DC: Key Takeaways
- Direct DC power eliminates inverter standby draw and cuts out double-conversion energy waste.
- Adding a dedicated voltage regulator ensures steady power delivery as battery voltages fluctuate under load.
- Running on DC allows you to bypass complex mains-reliant setups while powering the unit smoothly off-grid.
- Sizing your cables correctly, verifying polarity, and installing proper fusing protect your gear in harsh outdoor environments.
Why Direct Starlink Mini DC Power Beats AC Inverters
Direct DC power avoids converting battery storage to AC mains power and back again, significantly reducing conversion heat loss and eliminating the continuous idle draw of an inverter.
Five practical benefits of powering a Starlink Mini from DC
Direct DC power is useful because it can:
- Avoid unnecessary inverter conversion: It can remove the need to convert battery power from DC to AC and back to DC again.
- Suit mobile power systems: A correctly configured vehicle, caravan or auxiliary battery setup can supply the Mini without relying on mains power.
- Simplify the setup: Depending on the existing electrical system, direct DC power can reduce the number of power components required.
- Support off-grid connectivity: Compatible DC battery systems can keep the Mini powered when mains electricity is unavailable.
- Allow flexible installation: Suitable cable lengths, connectors and regulated power options can be matched to different vehicle and caravan layouts.
The sections below explain the electrical requirements, battery considerations and wiring practices behind each benefit.
When setting up satellite internet in a caravan, campervan, or remote bush camp, energy conservation is vital. The dish itself is engineered for mobility, averaging a lean operational power draw as outlined in The Verge's report on Starlink Mini power specifications.
When powered through a conventional mains inverter, battery energy undergoes a double-conversion cycle where direct current is stepped up to alternating current, only for the power adapter to transform it back to direct current. Each stage generates waste heat, while large inverters consume steady baseline power just staying active.
Purpose-built solutions like the StarPower V2 and StarPower V3 DC power supplies deliver substantial DC-to-DC efficiency advantages over traditional AC inverters by supplying direct, regulated power with minimal losses and lower overall system draw.
Running directly on DC also enables greater network flexibility, allowing you to bypass standard routers for tailored off-grid vehicle and marine setups.
Starlink Mini Power Requirements: Voltage, Wattage and Amperage
The Starlink Mini is rated for a 12–48 V DC input, with a maximum input rating of 60 W. Starlink lists average power consumption at 25–40 W, so the power source needs to provide stable voltage and enough available power rather than simply using a plug that physically fits. Starlink also states that performance is guaranteed only when using its included power supply and cable.
Voltage is the electrical pressure available to the terminal, while current is the flow of electricity. Together, they determine available power. In practical terms, a nominal 12 V battery system can power a Mini when the cable run, wire gauge, connectors and regulator maintain sufficient voltage at the terminal. A nominal 24 V system has more voltage headroom, which can help reduce voltage drop over longer cable runs when the rest of the setup is correctly matched.
For caravan, 4WD and off-grid installations, choose a DC supply, cable and regulator rated for the Mini’s requirements, protect the circuit with appropriate fusing, and check polarity before connection. If a 12 V source causes power issues, Starlink recommends using a shorter cable run or a thicker cable, or supplying a higher voltage where the system allows it. See the official Starlink Mini specification sheet for the current input and USB-C PD requirements.
Sizing Your Battery Bank for Starlink Mini DC
To size your battery storage correctly, calculate your total daily energy demand based on the dish's runtime and compare it against the usable capacity of your battery bank.
When calculating off-grid capacity:
- Account for other essential DC loads such as fridges, lighting, and water pumps.
- Factor in battery chemistry characteristics; lithium iron phosphate (LiFePO4) batteries allow deep discharging, whereas standard lead-acid batteries should not be discharged past half their total capacity.
- Allow surplus capacity for overcast days when solar panels cannot fully recharge the battery bank.
How to Calculate Starlink Mini Battery Runtime
Estimate battery runtime by dividing usable battery energy in watt-hours by the Starlink Mini’s average power consumption in watts. For a 12 V nominal battery, usable energy is calculated by multiplying the battery’s amp-hour capacity by 12, then allowing for the battery’s recommended discharge limit and any conversion losses.
Using Starlink’s published average consumption range of 25–40 W, these simplified planning examples assume the battery capacity is fully available and do not include regulator, cable or other appliance losses:
- A 50 Ah lithium battery has about 600 Wh of nominal energy, which works out to roughly 15–24 hours for the Mini alone.
- A 100 Ah lithium battery has about 1,200 Wh of nominal energy, which works out to roughly 30–48 hours for the Mini alone.
- A 200 Ah lithium battery has about 2,400 Wh of nominal energy, which works out to roughly 60–96 hours for the Mini alone.
Continuous use draws from the battery for the entire time the Mini is operating. Intermittent use can extend the time between recharges, but the actual result still depends on temperature, network activity, battery condition, cable losses, regulator efficiency and other loads such as fridges, lights and water pumps. Treat these figures as a planning guide, not a guaranteed runtime, and leave a sensible battery reserve for the rest of the off-grid system.
Avoiding Low-Voltage Reboots and Signal Drops
Battery voltage sag under heavy electrical load can cause unexpected dish reboots or dropped satellite connections unless incoming power is actively stabilised.
Lead-acid and AGM batteries experience noticeable voltage drop as they discharge or when large inductive loads cycle on. While lithium batteries maintain a flatter discharge curve, long wiring runs can still introduce resistance that pulls input voltage below stable operating thresholds. A sudden drop causes the terminal's phased-array electronics to brown out and restart. Installing a dedicated DC-to-DC boost regulator ensures stable voltage delivery regardless of battery fluctuations, as outlined in our guide to powering Starlink directly from DC.
How to Set Up Direct DC Power for the Starlink Mini
A safe, reliable setup uses a suitable direct current source, quality wiring, and an appropriate regulator to match your vehicle or off-grid power plant.
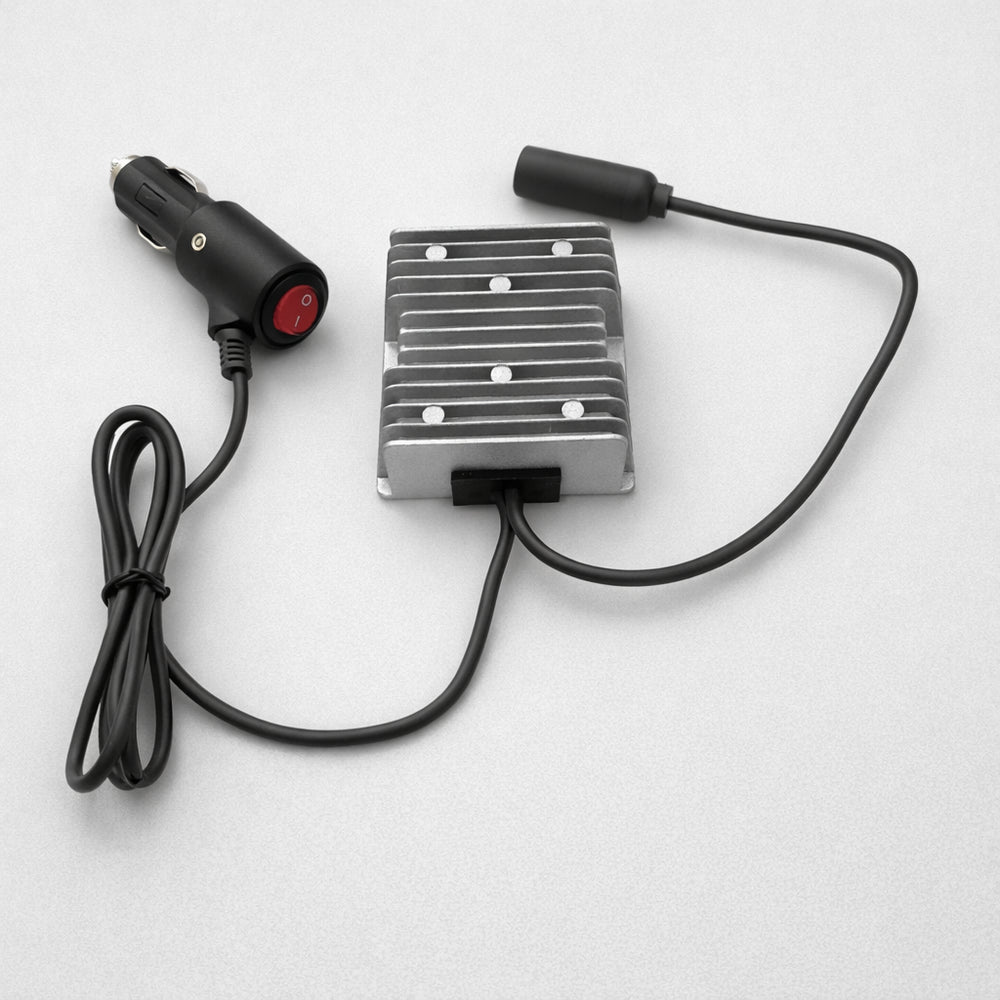
Depending on your touring setup, you can choose between flexible auxiliary connections or a dedicated hardwired installation using high-efficiency power units like StarPower V2 and V3 power supplies, which provide clean voltage conversion and allow simplified network management. For an overview of vehicle connection options, review our Starlink Mini 12V adapter guide.
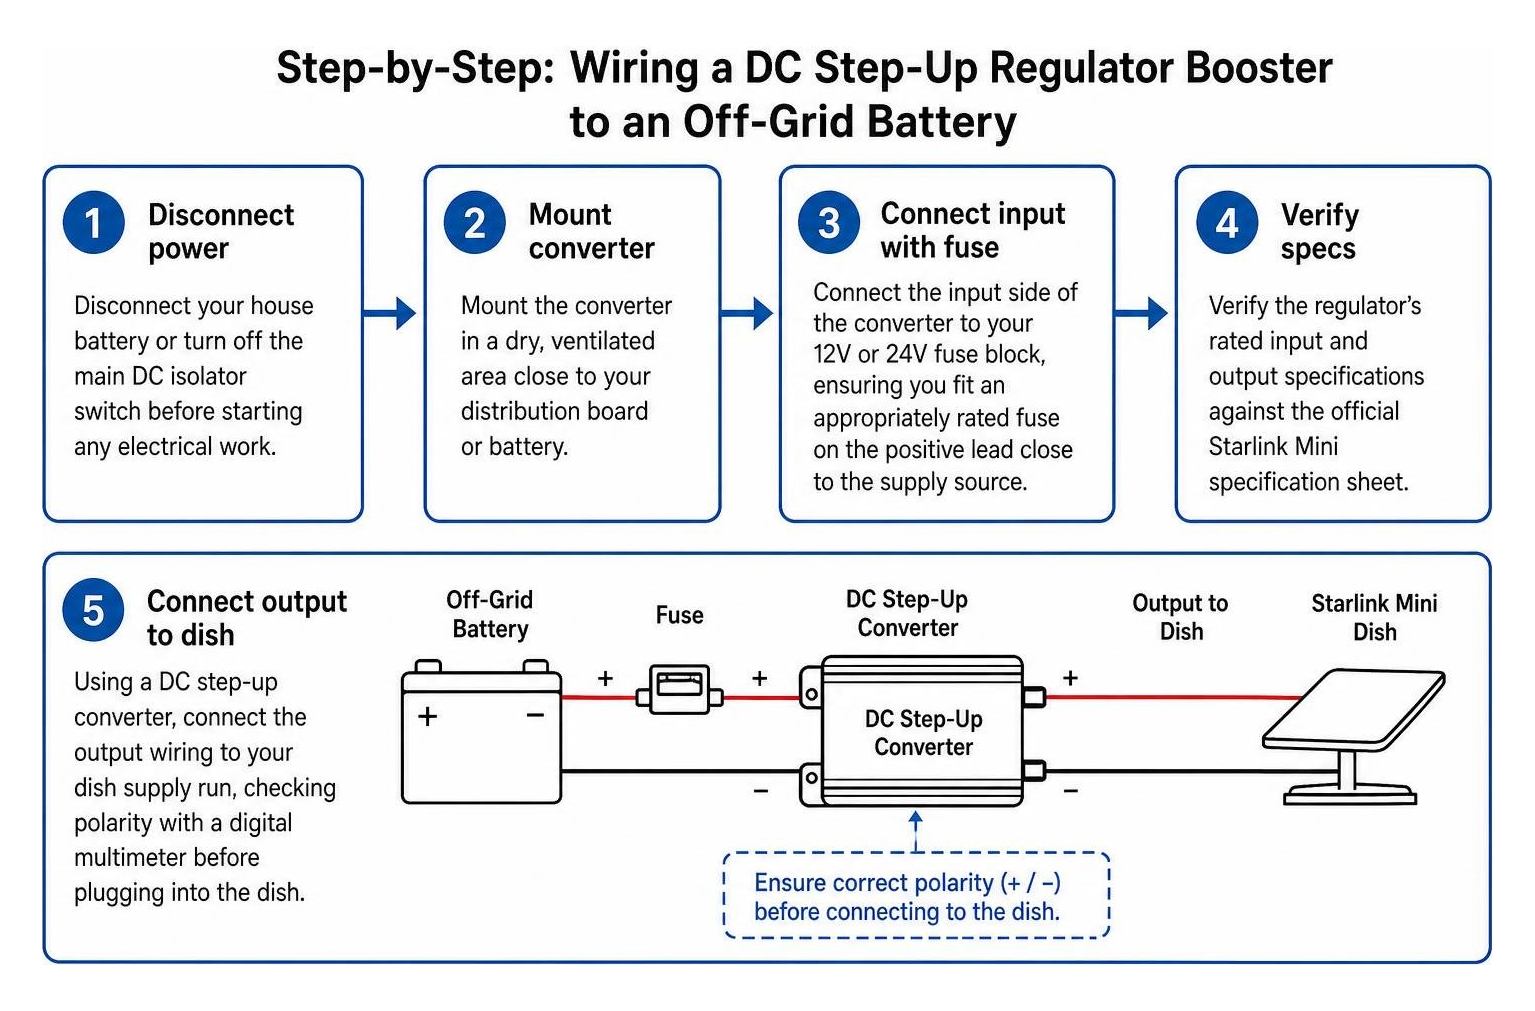
How to Wire a Starlink Mini DC Step-Up Converter
Wiring a dedicated boost regulator provides steady performance across fluctuating input voltages.
- Disconnect your house battery or turn off the main DC isolator switch before starting any electrical work.
- Mount the converter in a dry, ventilated area close to your distribution board or battery.
- Connect the input side of the converter to your fuse block, ensuring you fit an appropriately rated fuse on the positive lead close to the supply source.
- Verify the regulator's rated input and output specifications against the official Starlink Mini specification sheet.
- Connect the output wiring to your dish supply run, checking polarity with a digital multimeter before connecting to the dish.
Powering via USB-C PD and Auxiliary Sockets
For quick portable deployments, you can run the terminal from compatible auxiliary sockets or high-output USB-C Power Delivery ports.
High-current auxiliary vehicle sockets provide a straightforward plug-and-play connection without hardwiring into a distribution board. For rough off-road travel on corrugated tracks, heavy-duty latching connectors offer a secure joint that will not vibrate loose while driving.
When using USB-C PD power banks, ensure the power source supports high-wattage profiles and matches the required barrel jack pinout to maintain steady current during network activity.
Essential Safety and Wiring Standards for DC Setups
Proper fusing, correct cable gauge selection, and verified polarity are essential to protect your equipment and ensure reliable operation in demanding environments.
Following basic safety practices outlined in the official Starlink Mini installation guide ensures that your hardware remains safe from electrical faults and extreme weather.
Fusing, Polarity, and Wire Gauge Selection
Always fit an inline fuse on the positive line as close as practical to your battery terminal or fuse block to protect the wiring from short circuits.
When building or installing a direct DC setup:
- Size your wire gauge appropriately for the length of the run to prevent voltage drop over long distances.
- Always check the polarity of every connector with a multimeter before connecting the dish, as third-party barrel plugs can have reversed wiring orientations.
- Use tinned copper wiring to resist internal corrosion, particularly in coastal or humid Australian environments.
- Select durable, weather-resistant supply cables designed with the correct cross-section and terminal fitment for exterior routing.
Weatherproofing and Maintaining IP67 Integrity
Outdoor power connections must be sealed properly to prevent moisture ingress, dust build-up, and terminal corrosion.
The dish carries an IP67 rating, but environmental protection relies on a secure, flush seal at the connection port. When routing cables on exterior Starlink mounts:
- Ensure the rubber weatherproofing collar on the DC connector is fully seated into the dish housing.
- Avoid tight bends or mechanical strain right at the plug entry point.
- Seal any vehicle roof entry glands thoroughly with neutral-cure sealant to prevent water ingress.
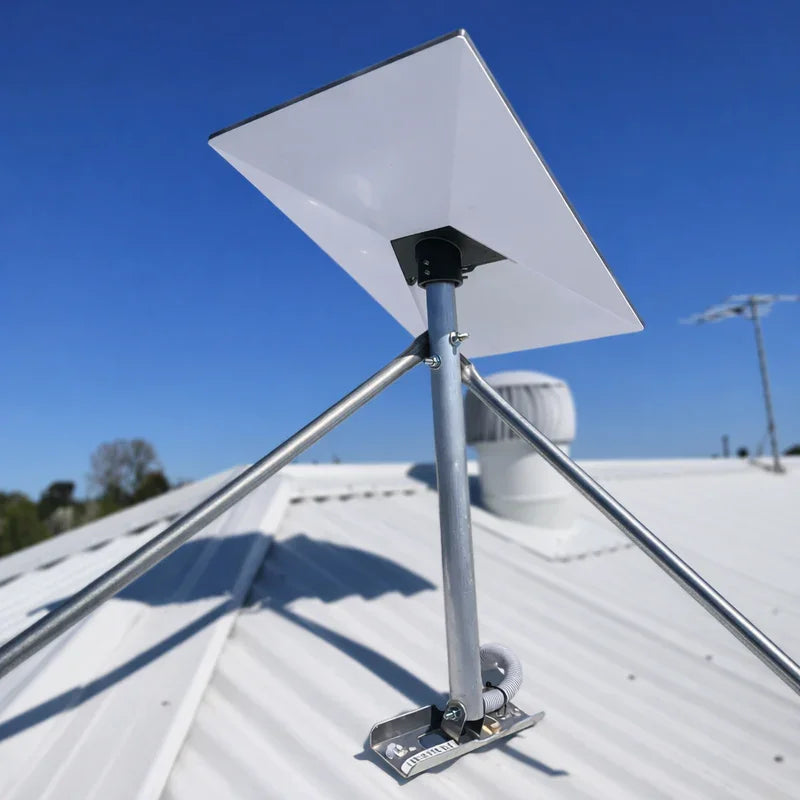
- Use precision-machined folded aluminium dish mounts that securely position the terminal without stressing cable joints.
Frequently Asked Questions about DC for Starlink Mini
Can the Starlink Mini run directly from an unfiltered 12V car battery?
While the dish supports a flexible input voltage range, connecting it directly to an unfiltered vehicle starting battery is not recommended. Alternator voltage spikes, starter motor cranking dips, and fluctuating vehicle charging systems can disrupt service or damage sensitive electronics. Installing an intermediate DC-DC power booster cleans the power, absorbs transient voltage spikes, and supplies steady output for the dish.
How long will a 100Ah lithium battery power the Starlink Mini on DC?
A 100Ah lithium iron phosphate battery provides substantial usable energy for a low-draw device like the Starlink Mini. Given the dish's lean operational power draw, a dedicated 100Ah lithium battery can easily run the system continuously for well over a full day of typical use, assuming no other large electrical loads are operating simultaneously and ambient temperatures remain moderate.
What size fuse should I install for my Starlink Mini DC setup?
Your fuse rating should match the maximum current draw of your specific converter and the gauge of your supply cable, placed as close to the power source as possible. For standard DC input runs feeding a step-up converter, a suitably rated inline blade fuse provides short-circuit protection while preventing nuisance blowing during initial boot-up power surges. Always check the manufacturer specifications for your converter and cable before selecting the fuse.
Starlink Mini DC Power: Final Takeaways
Powering your terminal directly from DC provides maximum electrical efficiency, protects your battery reserves from unnecessary inverter losses, and delivers reliable, uninterrupted connectivity wherever your travels take you.
Paired with robust, precision-machined folded aluminium dish mounts designed specifically to handle extreme weather, your off-grid communications setup will remain rock-solid in all conditions.
To get your setup ready for your next adventure, explore our purpose-built gear and support options:

Leave a comment
This site is protected by hCaptcha and the hCaptcha Privacy Policy and Terms of Service apply.