
Why a No-Drill Starlink Roof Mount Is Worth Getting Right
Want to mount Starlink on your roof without putting holes through your sheeting, tiles or waterproofing? The good news is that you have several strong no-drill options, and the right one can keep your roof watertight while still giving your dish a clear view of the sky.
Key Takeaways
- A no-drill Starlink roof mount can help protect your roof from leaks, rust and warranty issues.
- The best option depends on your roof type: ballasted mounts suit flat and low-pitch roofs, Ridgeline mounts suit pitched roofs, and magnetic mounts suit suitable steel surfaces.
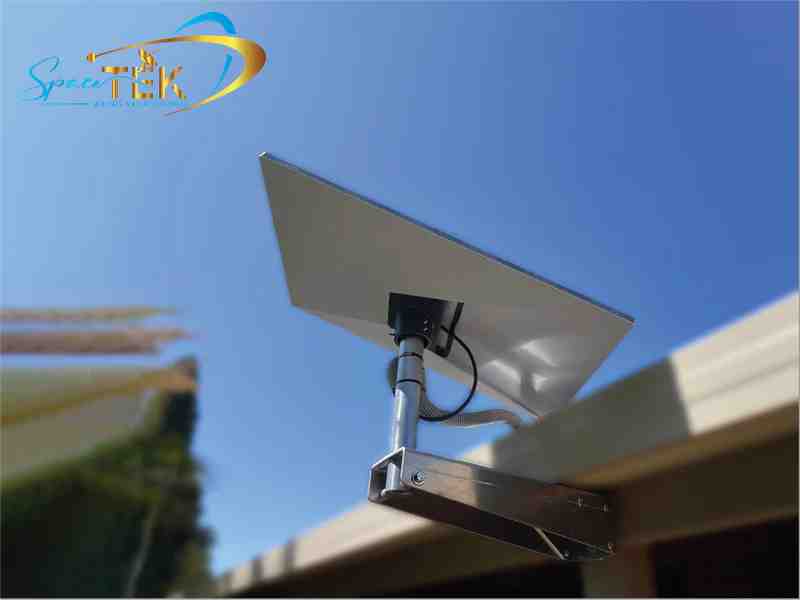
- Fascia and bargeboard mounts avoid the roof surface, but they still use fixings into the roof-edge structure.
- Always account for Australian wind conditions, especially if you are in an exposed, coastal or cyclone-prone area.
- A clean cable route matters just as much as the mount, so plan how the cable will enter the home before you start.
To mount Starlink on your roof without drilling into the roof surface, you can use a non-penetrating ballasted frame, a Ridgeline mount that straddles the roof peak, heavy-duty magnetic mounts for suitable steel surfaces, or a fascia mount that attaches to the timber or metal edge boards instead of the roof itself. These methods help keep your roof watertight while securing the dish against harsh Australian weather.
Here are the main no-drill Starlink roof mounting methods:
- Non-penetrating ballasted mount: A weighted base sits on a rubber pad and holds the mast in place using gravity and ballast blocks. It works best on flat and low-pitch roofs.
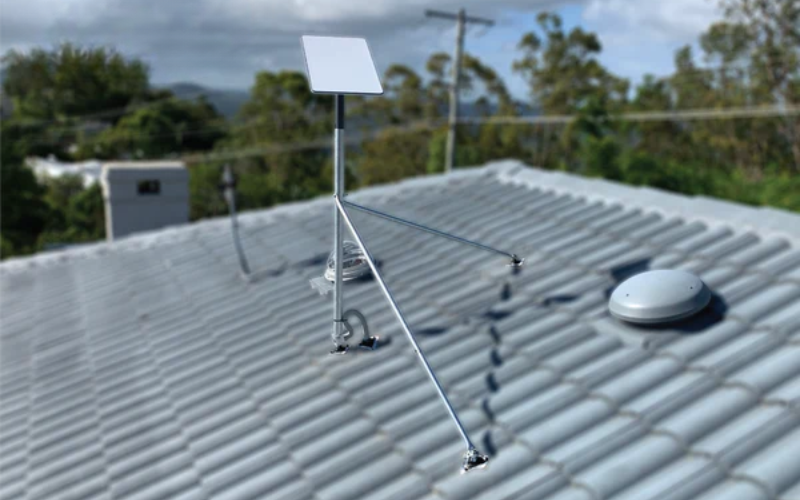
- Starlink Ridgeline mount: This straddles the roof ridge using ballast weight, with no screws into the roof surface.
- Magnetic mount: This attaches to suitable steel roofs using rubber-coated magnets.
- VHB adhesive landing pads: These bond to fibreglass or aluminium surfaces without mechanical fasteners.
- Fascia or bargeboard mount: This attaches to the fascia or bargeboard at the roof edge, avoiding the roof surface itself.
- Suction cup mount: This removable option suits smooth roof surfaces and portable setups.
Drilling through your roof to mount a Starlink dish might seem like the obvious approach, but it is rarely the best place to start. A poorly sealed penetration can lead to water damage, roof warranty issues and expensive repairs later.
For homeowners in rural and remote areas, where a reliable internet connection is everything, that is a risk worth avoiding. Non-penetrating mounts solve this problem by using ballast weight, adhesion or mechanical clamping to hold the dish securely without touching a drill.
The right method depends on your roof type, your local wind conditions and how permanent you want the setup to be. This guide walks you through the practical options so you can choose a mount with confidence.
Your Best Non-Penetrating Starlink Roof Mount Options
When you want a permanent or semi-permanent home setup, non-penetrating Starlink mounts are usually the safest way to protect the roof. They rely on smart engineering, weight and grip rather than screws through your roof surface.
The most common option is a ballasted frame. This uses a wide metal tray or base that sits directly on the roof, usually over rubber protection pads. Concrete blocks, pavers or purpose-made weights are placed into the trays to keep the whole assembly firmly anchored. A vertical mast then holds the Starlink dish above the roofline.

Another popular option is the Ridgeline mount, which is designed to straddle the peak of a pitched roof. It uses ballast bags or plates on either side of the ridge to balance the wind load without needing roof penetrations.
Pros of non-penetrating mounts
- No roof penetrations: Because you are not puncturing the roofing material, you avoid creating a new leak point.
- Warranty-friendly approach: Many roofing materials, including metal sheeting and tiles, can have warranty issues if they are drilled incorrectly.
- Portable setup: If you rent, plan to move or want flexibility, you can disassemble the mount and take it with you.
- Versatile placement: These Starlink mounts can often be used on flat ground or a concrete pad if roof access becomes unsuitable later.
Cons of non-penetrating mounts
- Weight and footprint: They need enough space and ballast weight to spread the load safely across the roof structure.
- Visual impact: Some homeowners do not love the look of ballast blocks on the roof.
- Manual handling: Moving heavy ballast up a ladder takes planning, care and proper safety gear.
For a broader comparison of roof mounting styles, see our Starlink roof mounts complete guide.
Matching No-Drill Mounts to Your Roof Type
Every roof is a little different, and a no-drill solution that works beautifully on a flat roof may be a poor fit for fragile tiles. Matching the mount to your roof material is important for safety, performance and long-term peace of mind.
Metal and tin roofs
Metal roofs, including corrugated iron and Colorbond, are common across Australia. Drilling into these sheets can create leak points, increase the risk of rust and cause warranty headaches.
For suitable metal roofs, non-penetrating clamp systems and magnetic setups can work well. Heavy-duty roof clamps can grip appropriate seams or edges without puncturing the metal, while rubber-coated magnets can suit steel surfaces where the roof profile and conditions allow.
For mobile setups, caravans or temporary installations on steel roofs, rubber-coated magnets can be a practical choice. Premium magnetic mounts use high-grade neodymium magnets with a protective rubber coating to help prevent scratching. They are best treated as a temporary or carefully checked setup, especially before driving or leaving the dish exposed to strong winds.
If you want to see practical mounting examples, read our mounting Starlink on tile, tin and corrugated roofs field test.
Tile and shingle roofs
Tile roofs, whether terracotta, concrete or slate, can be fragile. Walking on them can crack tiles, and drilling directly into them can create both damage and waterproofing problems.
To mount a dish on a tile roof without drilling into the roof surface, you have two main options:
- Ridgeline mount: This sits over the apex of the roof and spreads weight across both sides of the ridge. It uses ballast to stay in place, so tiles do not need to be penetrated.
- Fascia and bargeboard mounts: If you want to avoid the tiles completely, a fascia mount can be a clever alternative. It fixes to the timber or metal fascia under the gutters, rather than through the roof surface.
For shingle roofs, you can use a hybrid approach. Some installations use a flashing kit, while others can use a ballasted Ridgeline system to avoid roof-surface penetrations.
For a step-by-step breakdown on handling fragile tile surfaces safely, see our guide on how to install a Starlink tile roof mount safely.
Flat roof solutions and ballasted systems
Flat roofs are often the easiest surfaces for non-penetrating installations because there is no steep pitch to fight against.
A flat roof ballasted system uses a heavy-duty frame, often made from hot-dip galvanised steel or precision-folded aluminium, that holds standard concrete blocks. Rubber roof pads sit beneath the frame to protect the roof membrane, reduce movement and prevent the metal mount from rubbing against the roof surface.
For a closer look at flat roof options, check out our Starlink flat roof mount guide.
Calculating Ballast Weight and Wind Resistance
The wind resistance of a ballasted mount depends on the size of your Starlink dish, the height of the mast and the amount of weight holding the base down. Larger or higher-performance Starlink models can present more wind area than a standard residential dish, so they may need more ballast.
To work out the ballast weight needed for your location, think about:
- Your local wind region: Australia is divided into wind regions, with some coastal and northern areas exposed to cyclonic conditions.
- Terrain category: A sheltered suburban home is very different from an exposed hilltop, open paddock or coastal block.
- Mount height: A shorter mast experiences less leverage than a taller mast in the same wind.
Heavy-duty commercial-grade non-penetrating Starlink mounts are designed to handle strong conditions when loaded with the correct ballast. For a standard residential dish in a non-cyclonic area, the required ballast should be distributed evenly across the trays. If you live in a high-wind area, it is worth checking local building requirements or asking a qualified installer before committing to a roof setup.
Step-by-Step Guide to Installing a No-Drill Starlink Mount
Installing a non-penetrating mount is fairly straightforward, but you are still working at height with heavy weights. Take your time, use proper access equipment and do not climb onto a roof if conditions are wet, windy or unsafe.
Step 1: Check the site
Before carrying gear onto the roof, open the Starlink app and use the obstruction tool. You need a clear view of the sky, so look for branches, chimneys, nearby buildings and anything else that could interrupt the signal.
Step 2: Prepare your materials
Gather your non-penetrating frame, rubber protection pads, mast, hand tools and ballast blocks. If you are using a Starlink Mini or Gen 3 dish, make sure you have the correct pipe adapter or flatmount interface ready.
Step 3: Lay down the protective pads
Position the rubber pads on the roof surface exactly where the mount frame will sit. This helps stop the metal frame from rubbing, sliding or wearing against the roof over time.
Step 4: Assemble the frame and mast
Assemble the metal base frame on top of the rubber pads. Attach the vertical mast and use a bubble level to make sure it is straight. A well-aligned mast gives the dish the best chance of positioning itself correctly.
Step 5: Add the ballast
Carefully move your concrete blocks or ballast weights onto the roof and place them evenly into the ballast trays. Check that the weights are secure and cannot slide out of the frame.
Step 6: Mount and align the Starlink dish
Click the Starlink dish into the mast adapter and secure it. If you are using a Gen 3 dish, manually align it using the Starlink app.
Step 7: Route the cable safely
Route the cable across the roof and secure it with UV-resistant clips. Create a drip loop before the cable enters the home so rainwater does not track along the cable into the living space.
Frequently Asked Questions About No-Drill Starlink Mounts
Can a non-penetrating mount handle extreme Australian weather?
Yes, a quality non-penetrating Starlink mount can handle tough Australian conditions when it is matched to the roof, installed correctly and loaded with the right ballast. Look for strong materials such as hot-dip galvanised steel, marine-grade aluminium or reinforced composite, especially if you are near the coast or in a high-UV area.
In high-wind or cyclone-prone regions, you may need extra ballast or secondary tethering to suitable structural points. If you are unsure, get advice from a qualified installer or builder before putting the mount on the roof.
Will a third-party mount void my Starlink warranty?
Using a quality third-party mount should not be a problem as long as it does not damage the dish, mast interface or cable connector. The key is to choose a mount that fits properly and supports the dish securely.
At SpaceTek Australia, our Starlink mounts are precision-made from premium aluminium or reinforced composite rather than 3D-printed plastic, so they are built for a secure fit in Australian conditions.
How do I run the cable inside without drilling?
A completely drill-free cable route can be tricky, but you still have a few practical options:
- Use existing entry points: Route the cable through existing roof vents, eave vents or sub-floor access points.
- Use a window pass-through cable: A flat ribbon cable can pass through some window seams while still allowing the window to close.
- Use a fascia entry point if needed: If you must make a small hole, going through a vertical timber fascia board under the eaves is usually easier to weatherproof than drilling through the roof surface.
Off-Grid and Mobile No-Drill Solutions
If you travel with a caravan, 4WD or touring setup, a no-drill Starlink mount can make life a lot easier. You can get a reliable connection at camp without permanently altering the vehicle or roof.

If you are using the compact Starlink Mini, heavy-duty suction cups can be a handy temporary option. They let you mount the dish to a smooth fibreglass, glass or aluminium surface while parked, then remove it again when it is time to pack up.
To get more out of an off-grid setup, it is also worth thinking about power. Running a Starlink router and dish through an AC inverter can waste battery capacity. A DC power supply such as StarPower V2 or StarPower V3 lets you run the Starlink system directly from a 12V or 24V battery setup, reducing conversion losses and helping you stay online longer.
Choose the Right No-Drill Mount for Your Roof
Mounting your Starlink dish without drilling is a smart way to protect your home from water damage while still getting the clear sky view your dish needs. Whether you choose a ballasted frame for a flat roof, a Ridgeline system for a tiled roof or a magnetic setup for a suitable steel caravan roof, there is a no-drill solution that can suit the job.
At SpaceTek Australia, we design and manufacture premium, rust-resistant Starlink mounts and DC power solutions made for Australian conditions.
Ready to upgrade your off-grid setup or find the right no-drill mount? Contact SpaceTek Australia to speak with our local team.


Leave a comment
This site is protected by hCaptcha and the hCaptcha Privacy Policy and Terms of Service apply.